
Sometimes, you need to reset your Windows PC. There are a ton of reasons for it — maybe something isn’t working properly, so you want to reset and try to fix it. Or perhaps you need to return a work or school PC and you want to clear your data off it. Or, maybe you want to start fresh and clear out years of digital clutter in one fell swoop.
Whatever the reason, Windows has a somewhat approachable reset tool. Before we get into how to use the reset tool, I want to note that this article will focus on Windows 11 since it’s the newest (and current) version of Windows. Most of these steps should apply to previous versions of Windows (very little, if anything at all, has changed here since Windows 10), but some things may look a little different.
With that said, let’s get into it.
How to reset Windows
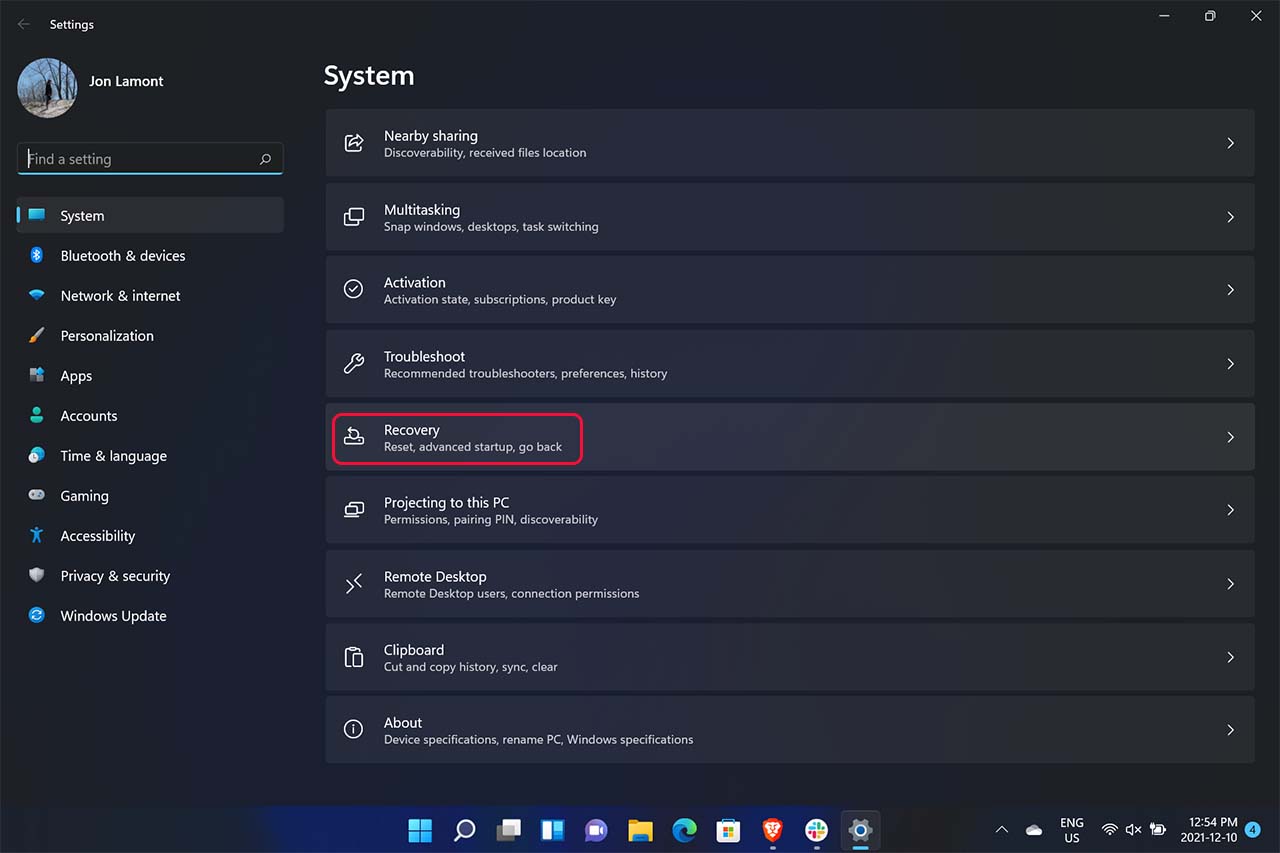
First things first, you need to open Settings then scroll down and click ‘Recovery.’ There are a few troubleshooting tools here you can play with, but for the purpose of this article, we’re going to go straight for ‘Reset this PC.’ Click the ‘Reset PC’ button to open the reset tool.
If for some reason you can’t access the settings app, you can boot your PC into the Windows Recovery Environment by holding the Shift key and clicking restart. Then click Troubleshoot > Reset this PC to get to the reset tool.
Once you open the reset tool, you’ll just need to click through and select a few options. Don’t worry, I’ll explain them as we go.
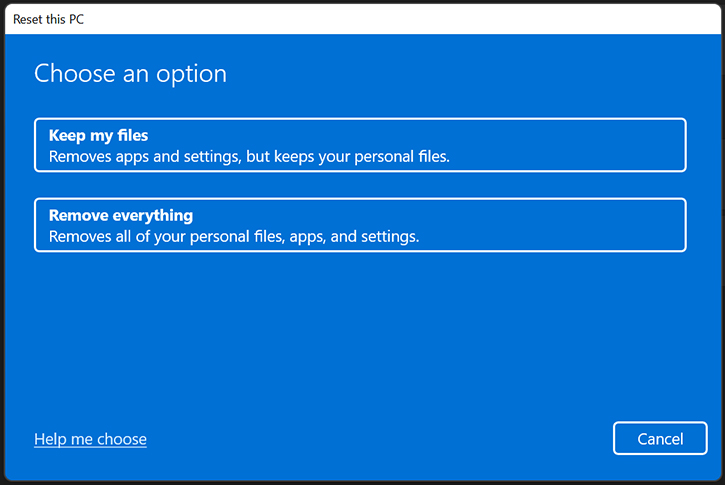
The first choice is between ‘Keep my files’ and ‘Remove everything.’ If you’re just looking to try and fix and Windows issue and don’t want to lose anything, the first option for you. Anyone wanting to clean house — for example, on a work laptop you’re giving back to IT — you’ll want option two.
Next up, the reset tool will ask how you want to reinstall Windows. You can choose to reinstall from the cloud via an internet connection or use a local reinstall from files stored on-device.
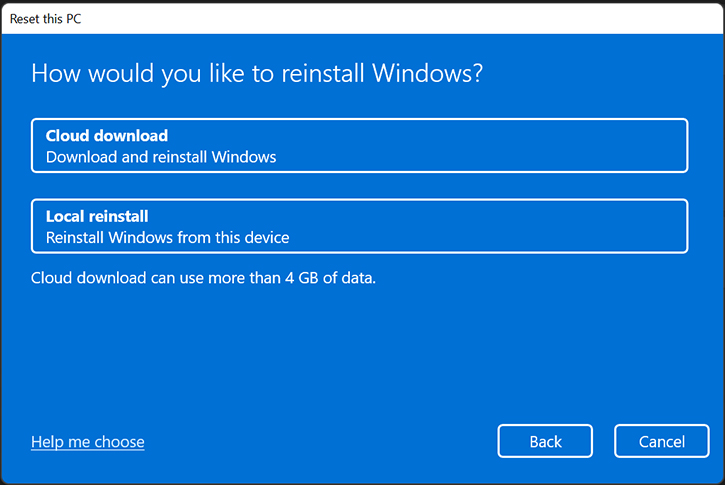
I almost exclusively use the local restore to avoid waiting for a download (although the estimated 4GB size Microsoft lists isn’t huge). As someone who regularly resets review units to return them once I’ve finished testing, I’ve also never had an issue with using local reinstall. That said, there may be instances where cloud reinstall is the way to go, so make the selection based on your needs.
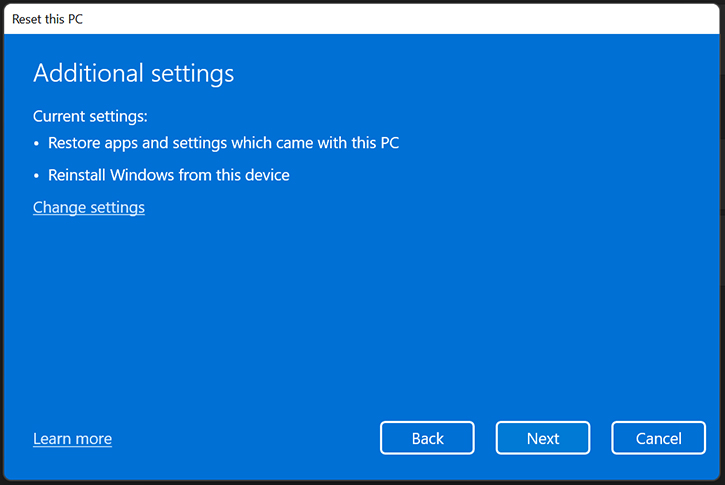
Next up is the ‘Additional settings’ screen, which lists out the current reset options you’ve selected. However, there are almost always more options worth looking at if you click ‘Change settings’ at the bottom of the list.
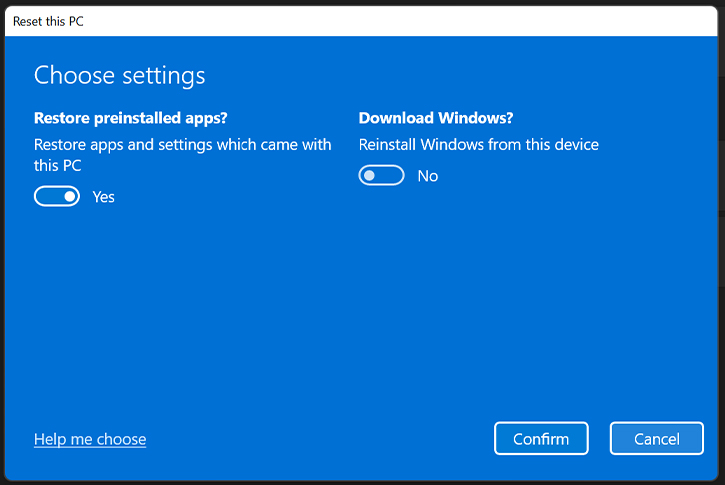
For example, if you’re doing a reset and keeping your files, clicking ‘Change settings’ will give you a toggle to restore preinstalled apps and settings that came with your device.
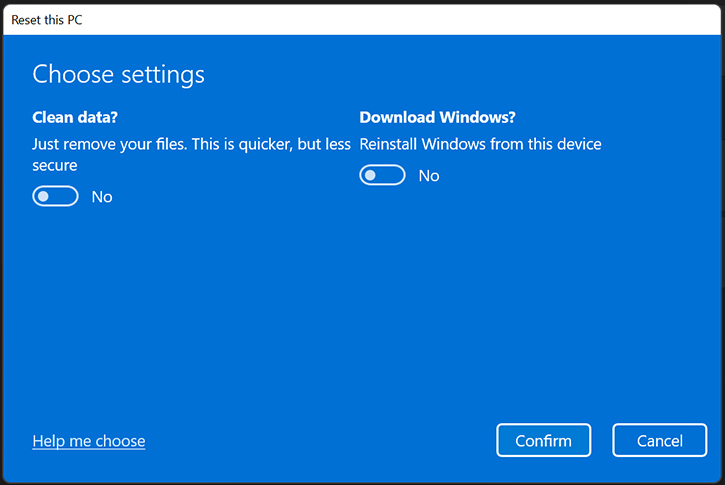
When doing a full reset, on the other hand, this section includes an option to ‘Clean data.’ It takes longer, but it fully removes your files from the drives. I highly recommend cleaning your drive if you’re doing this before giving away that device as it should help prevent someone from recovering any of your personal files down the line.
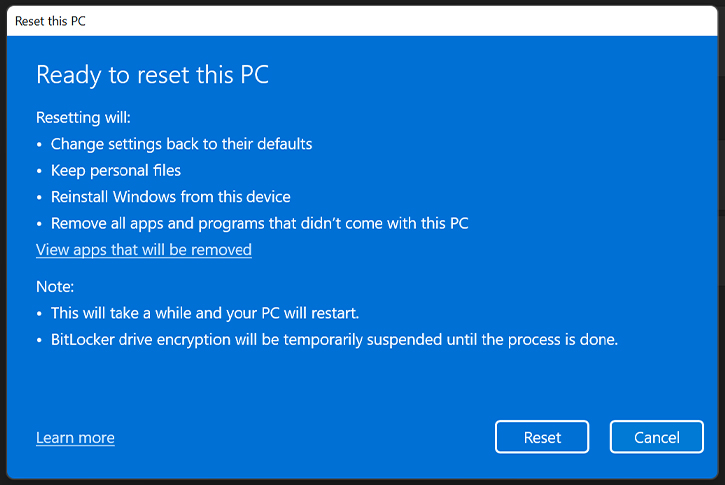
Finally, the last screen in the reset tool will give a summary of what will happen when you reset. This should include all the options you’ve selected so far. Review the list and, if everything looks good, click ‘Reset’ to start the process. Depending on your device, the size of your drives and other factors, the reset can take anywhere from a few minutes to an hour or more. If you’re resetting a laptop, you should plug it in and leave it plugged in throughout the process.
That should be it. You’ll need to wait while Windows runs through the reset process. When it’s done, you’ll either be able to go back to using your computer (if you kept your files) or run through the whole initial set-up process again, as if you just bought a new computer.
MobileSyrup may earn a commission from purchases made via our links, which helps fund the journalism we provide free on our website. These links do not influence our editorial content. Support us here.


