
Getting a new smartphone can be really exciting, especially if you haven’t upgraded for a while. However, with a new phone comes the process of transferring your data. If you don’t know what you’re doing, this can be a tricky step to tackle.
Thankfully, the data transfer process has improved significantly over the last few years. Most manufacturers offer apps or software to help you through the process. That said, it can still be complicated at times, so we’ve put together this guide on moving to a new phone.
First up, we need to tackle a few universal steps. These are things you’ll need to do regardless of which phone you have and which phone you plan to switch to.
- Back up your data on your old phone (we’ll have more specifics on this depending on iOS or Android below).
- Make sure you’ve got some time and a solid Wi-Fi connection before you start.
- Have power cables ready to either charge your phones or connect them if need be.
- Move your SIM card first.
- This is mandatory for all phones, but it can be an important step in some cases. Samsung phones, for example, perform a reset when you insert a SIM card. If you transfer your data before you put in your SIM, you could wipe everything you moved over. So, we recommend swapping your SIM card first.
Moving from iPhone to iPhone
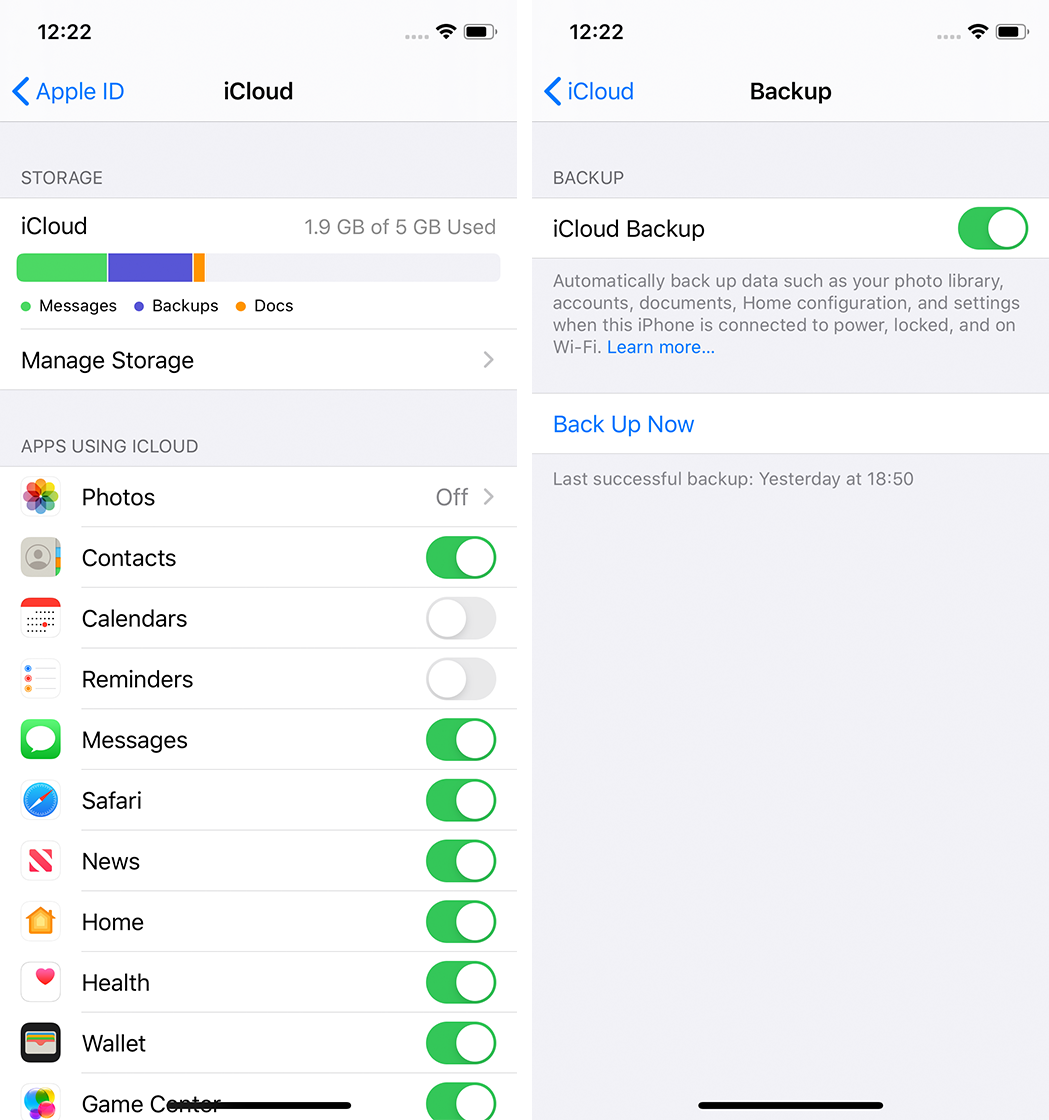
If you’re using an iPhone and you just got a new iPhone, congrats! The steps for transferring your data are relatively simple. First, make sure you backup your data on your old iPhone. The best way to do that is in Settings > [Your Name] > iCloud > iCloud Backup.
On this screen, you’ll be able to see when your iPhone last performed a backup and tell it to do one right away. It’s important to note that by default, iCloud only gives you 5GB of storage. If you want more, you’ll need to pay for it. You can buy more by tapping Manage Storage > Change Storage Plan. In Canda, 50GB costs $1.29 per month.
However, here’s a little secret that can save you some money: the biggest iCloud storage user is your photo library. iCloud offers a breakdown of what’s using your storage. By default, Photos are set to back up to iCloud and usually, they take up the most space. If you don’t want to pay Apple for more space, you can use tools like Google Photos to back up your pictures for free and turn off Photos backup for iCloud. That should free up plenty of space for your iPhone to backup all your app data to iCloud instead.
Once your old iPhone is backed up, you’re ready to start the transfer. Apple offers a few ways to handle an iPhone to iPhone data transfer.
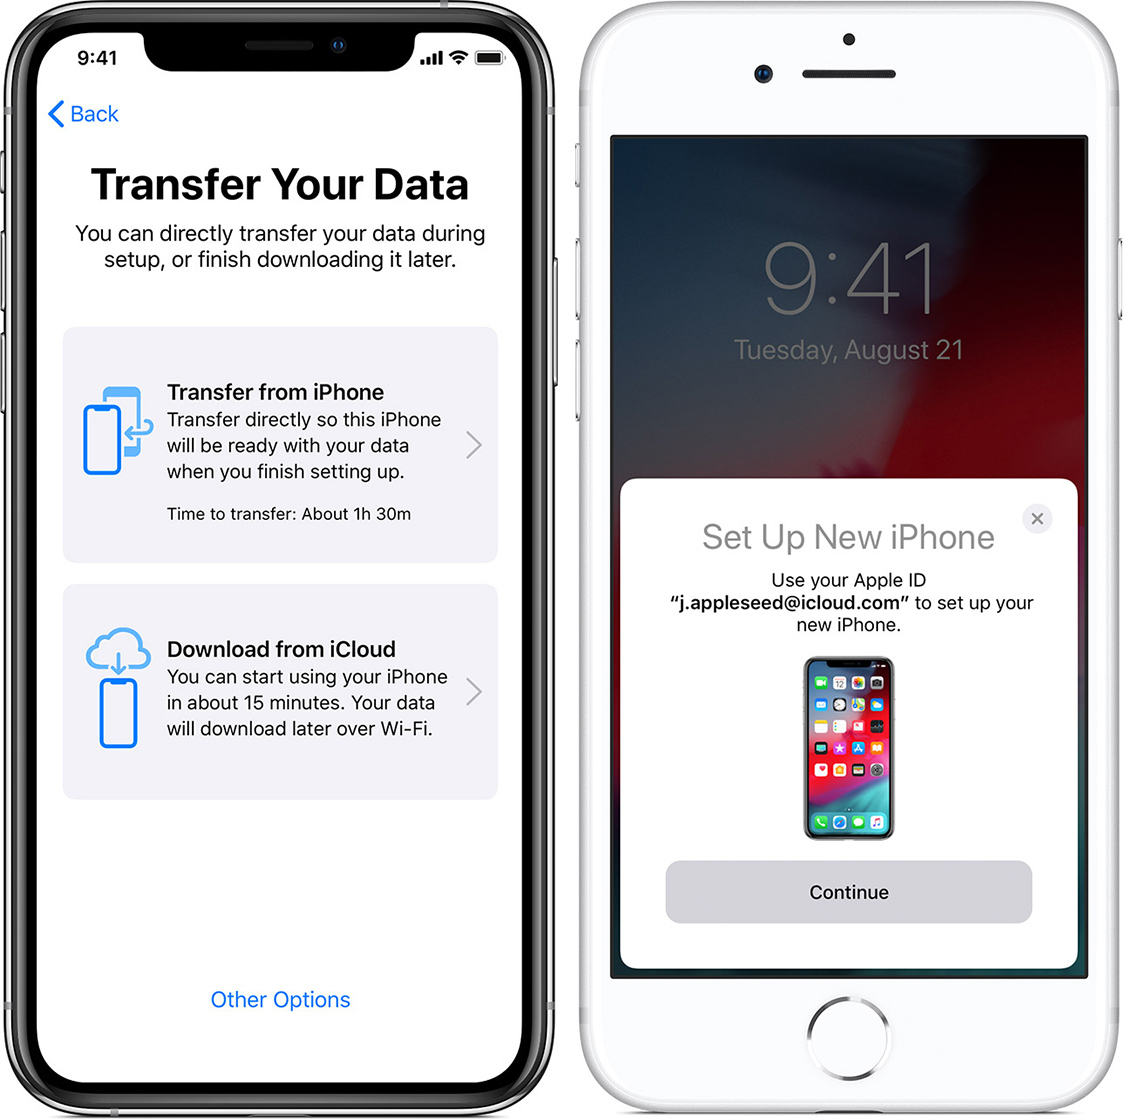
If your old and new iPhones both run iOS 11 or later, you can use Quick Start to get started. If your iPhones are on iOS 12.4 or later, you can use the iPhone migration tool to transfer data either wirelessly or through a wired connection.
Either way, you’ll need to sign in with your Apple ID. Make sure you use the same one from your old iPhone as that’s what your iCloud backup is tied to. There will be an authentication step, which usually involves scanning an animation on your new iPhone with the camera on your old iPhone.
After that, you’ll have to follow some set-up steps like adding your passcode and setting up Face ID or Touch ID. Then your new iPhone will ask about data transfer. If you’re using Quick Start, you’ll have the option to restore from your iCloud backup. Select that, and your new iPhone will begin downloading and restoring data, including apps and settings.
If you’re using the iPhone migration tool, the iPhones will use either their wired or wireless connection to transfer your data.
Once the process is complete, you should be ready to go. It’s worth noting that some apps may need input from you to set up. That could mean logging in again if need be. If you used the Google Photos trick mentioned above, you can access your pictures through the Google Photos app.
You can learn more about the process by checking out Apple’s support page.
Moving from Android to iPhone
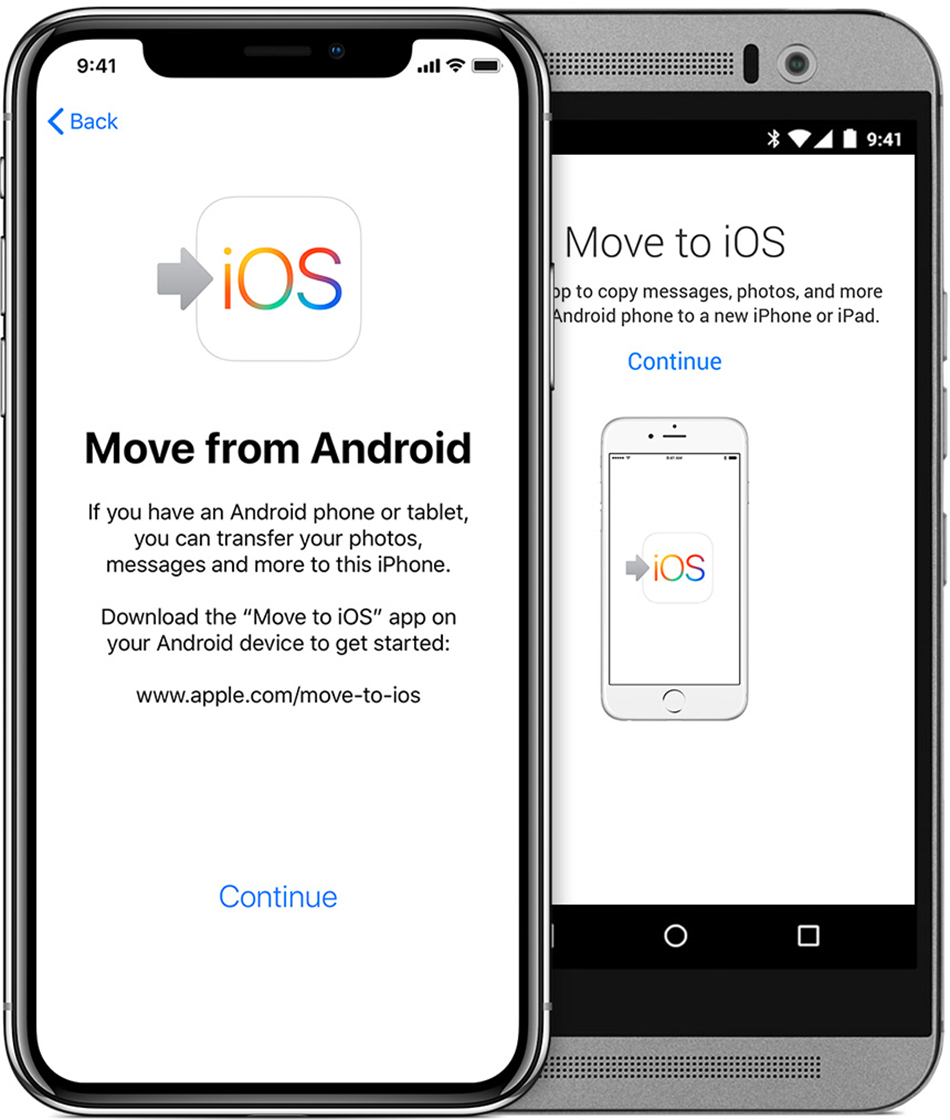
If you’re coming from an Android phone to an iPhone, you’ll need to download the ‘Move to iOS‘ app from the Google Play Store.
In my experience, the app usually works well. However, there are several reports on the Play Store noting that Move to iOS has some issues, so your mileage may vary. As long as you’ve got a more mainstream Android phone like a Pixel or Samsung device, you likely shouldn’t have any trouble.
Once you’ve downloaded Move to iOS, you’ll need to make sure your Android phone has Wi-Fi turned on and then follow the steps.
To start, as you go through the set-up process on your new iPhone, keep an eye out for the ‘Apps & Data’ screen. When you arrive, tap the ‘Move Data from Android’ option.
On your Android phone, open the Move to iOS app and enter the code displayed on your iPhone. Then, select the content you want to move to your iPhone and let it perform the transfer. Depending on how much content you’re moving, this could take a long time. Again, a helpful tip is to use Google Photos or a similar service to back up your pictures and videos so you don’t have to wait for them to transfer between devices.
It’s also worth noting that Move to iOS won’t transfer everything. It will move your contacts, message history, camera photos and videos, web bookmarks, mail accounts and calendars. Plus, it’ll even make a list of all your free apps that are available on both the Play Store and App Store you can easily download them again on your new iPhone. However, paid apps and apps that aren’t available from the App Store won’t be transferred.
You can learn more about using Move to iOS on Apple’s support site.
Switching to a new Android phone
![]()
Whether you’re coming from an iPhone or another Android phone, switching to a new Android device can be a fairly straightforward process. For the sake of simplicity, we’re going to tackle the general steps here. Depending on the manufacturer of your new Android phone, the software you use could differ significantly, but the basic process will be the same.
Things to do before you start
- If you’re coming from an Android phone, make sure to backup your data.
- I would recommend backing up to your Google account because that will be accessible on every Android phone. You’ll find the settings for that in the Settings app under ‘System’ or ‘Accounts and Backup,’ depending on the phone. If you’re not sure, just search ‘Backup.’
- If you’re moving between Android phones from the same manufacturer — i.e. a Samsung phone to a Samsung phone — you could be better off using that company’s provided backup software.
- Make sure you have your power cables and, if your phone came with one, a USB-A to USB-C adapter.
- A solid Wi-Fi connection.
- Move your SIM card first.
Performing the transfer
![]()
Turn on your new Android phone and follow the initial set-up steps. That includes inserting your SIM card, connecting to your Wi-Fi and more. Keep an eye out for a screen that prompts you to copy your data. When you arrive, most Android phones will prompt you to move your data from your old phone. There are a few ways you can do this:
- Plug the new phone into the old phone with a cable and adapter.
- Connect phones wirelessly.
- Use your Google account and download a backup from another phone.
- Use the manufacturer-provided transfer app or backup solution.
Regardless of which one you choose, follow the steps as displayed on your new phone to connect your devices and complete the transfer. Steps usually include logging into your Google account, selecting the content you want to move and waiting for the devices to perform the transfer. As with the iPhone transfer, using tools like Google Photos to backup your pictures and videos can speed up this process.
While the transfer happens, most Android phones will let you finish the set-up process. Afterwards, it may take some time for all your apps to show up again as your phone will re-download them from the Play Store. Further, that means you will have to sign in to your apps again.
If you’re looking for more specific help on transferring data to a new Android phone, we’ve included links to guides provided by prominent manufacturers below.
- Transfer data to a Pixel from Android
- Transfer data to a Pixel from iPhone
- Transfer data to a Galaxy phone from an iPhone with Smart Switch
- Transfer data to a Galaxy from a Galaxy phone with Smart Switch
- How to use OnePlus Switch to transfer data to a new OnePlus phone
- How to transfer data to your LG phone using LG Mobile Switch
MobileSyrup may earn a commission from purchases made via our links, which helps fund the journalism we provide free on our website. These links do not influence our editorial content. Support us here.
