
Every year when Apple releases a new iPhone, we almost always see at least some level of camera improvements.
Alongside the upgrades, Apple typically showcases stunning photos using its latest iPhone, putting a lot of focus on camera quality, image processing and low-light photography.
However, recently the tech giant has placed more of an emphasis on video. For example, the iPhone 11 lineup brought with it QuickTake and the iPhone 12 Pro and Pro Max introduced Apple ProRAW in iOS 14.3.
This year, Apple’s iPhone 13 lineup features what Apple is calling ‘Cinematic Mode.’
What is Cinematic Mode?
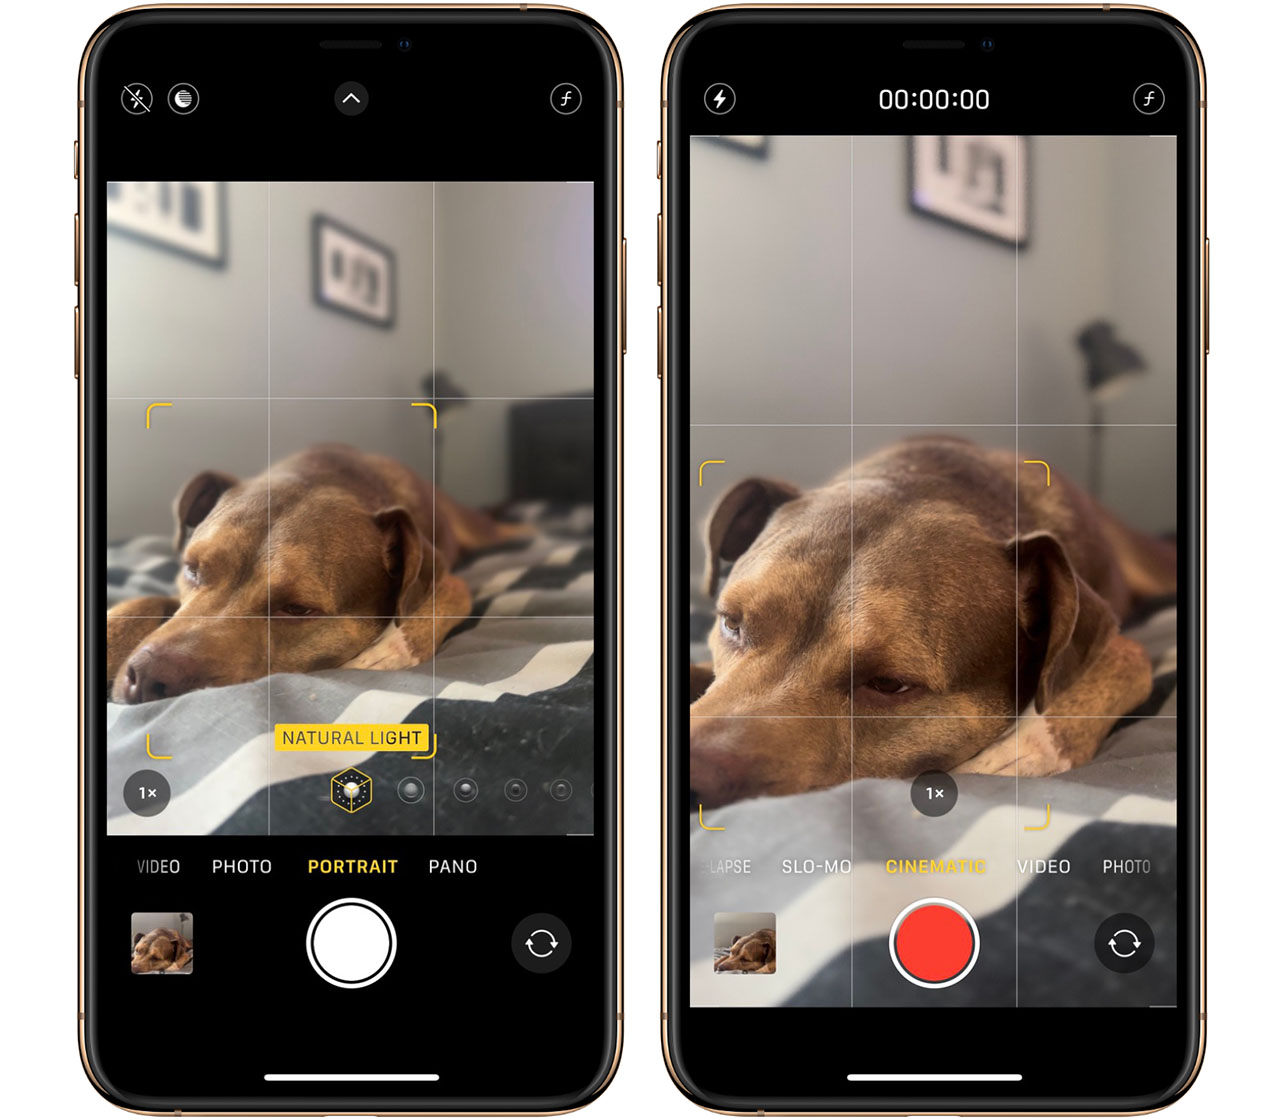
To understand Cinematic mode, you first need to understand ‘Portrait Mode,’ which Apple unveiled alongside the iPhone 7 Plus. Portrait Mode blurs out the background of your photo, leaving the person, pet, or object in focus. This creates what is called a bokeh or depth-of-field effect. When the feature was first introduced, Portrait Mode was limited to the iPhone 7 Plus’ 2x telephoto lens.
The 1x wide-angle lens was used to detect depth and create the bokeh effect. Portrait Mode was inherited by every two-lens iPhone after the iPhone 7 Plus and excluded by every single-lens iPhone until the iPhone XR was released. The iPhone XR used software within iOS to create the blur effect instead of relying on additional lenses.
“Cinematic Mode only works on Apple’s iPhone 13 lineup.”
Cinematic Mode brings the bokeh effect of Portrait Mode over to your videos. When you select Cinematic Mode in your iPhone 13’s camera app, it detects a person, pet, or object and places them in focus. The background and foreground blurs around your subject, placing the attention squarely on them. When two people are in your frame, Cinematic mode focuses on whoever is closer until the closer subject turns away. The focus then shifts to the further away subject in the frame.
Cinematic mode gets its name from the bokeh effects used in cinematic films. Apple’s goal with this exclusive iPhone 13 feature is to democratize cinema-quality video, allowing you to take the best video of your pets you possibly can — at least, that’s what I’ll be using it for.
How to use Cinematic Mode

- Launch the camera app on your iPhone 13, 13 mini, 13 Pro, or 13 Pro Max
- Swipe left to right twice anywhere on the screen to select Cinematic Mode
- Press the red circle to start or stop recording
The bokeh effect will automatically set itself. However, if you want to adjust it before recording, tap on the ƒ symbol in the top right-hand corner (vertical orientation) or top left (horizontal orientation). A slide will appear in the bottom third of your screen where you can adjust the bokeh effect between 2.0 and 16. 2.0 will be the harshest blur, where 16 will have the weakest.
While in Cinematic Mode, you can perform a small swipe up (vertical orientation) or a small swipe right to left (horizontal orientation) in the middle of your screen to reveal three buttons.
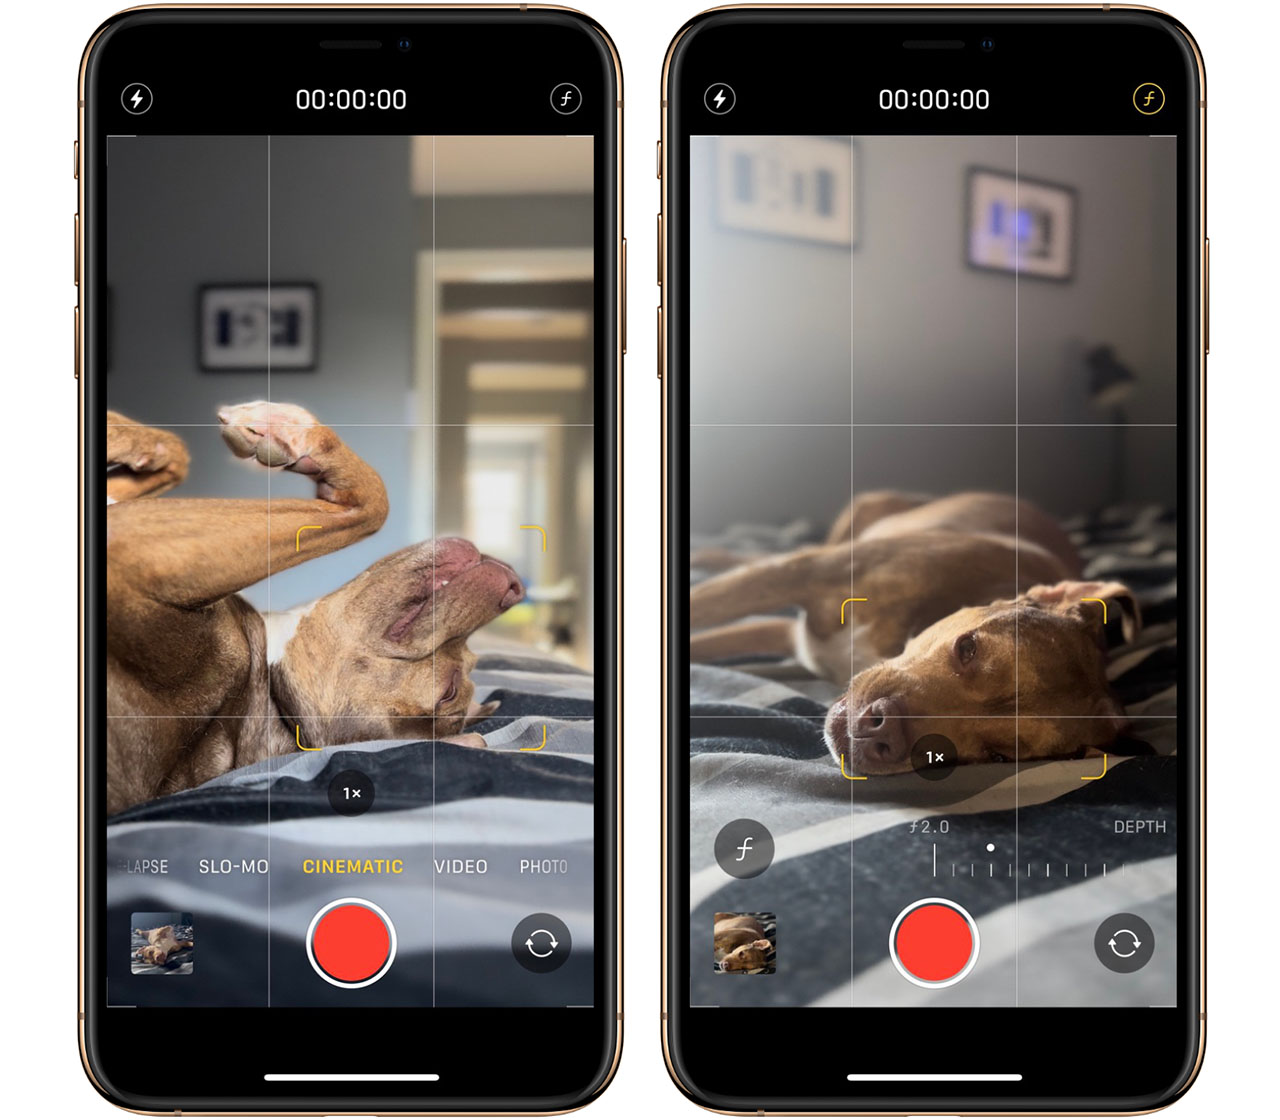
This hidden menu has a lightning bolt, a +/- symbol, and the ƒ button. Tapping on the lightning bolt will allow you to turn on or off your iPhone’s flashlight if you need additional lighting while recording. Cinematic Mode only works in well-lit environments, just like Portrait Mode.
Tapping on the +/- icon will allow you to adjust how much light your camera takes in (also known as exposure). This will enable you to create a lighter or darker tone in your video.
The ƒ button allows you to adjust the bokeh effect just like the original ƒ button did.
You can also tap on the 1x button in the lower third of your screen to change your lens to the 3x zoom if you would rather use the telephoto lens and be closer to your target. However, you can’t use the 0.5x ultra-wide lens in Cinematic Mode.
How to edit your recordings
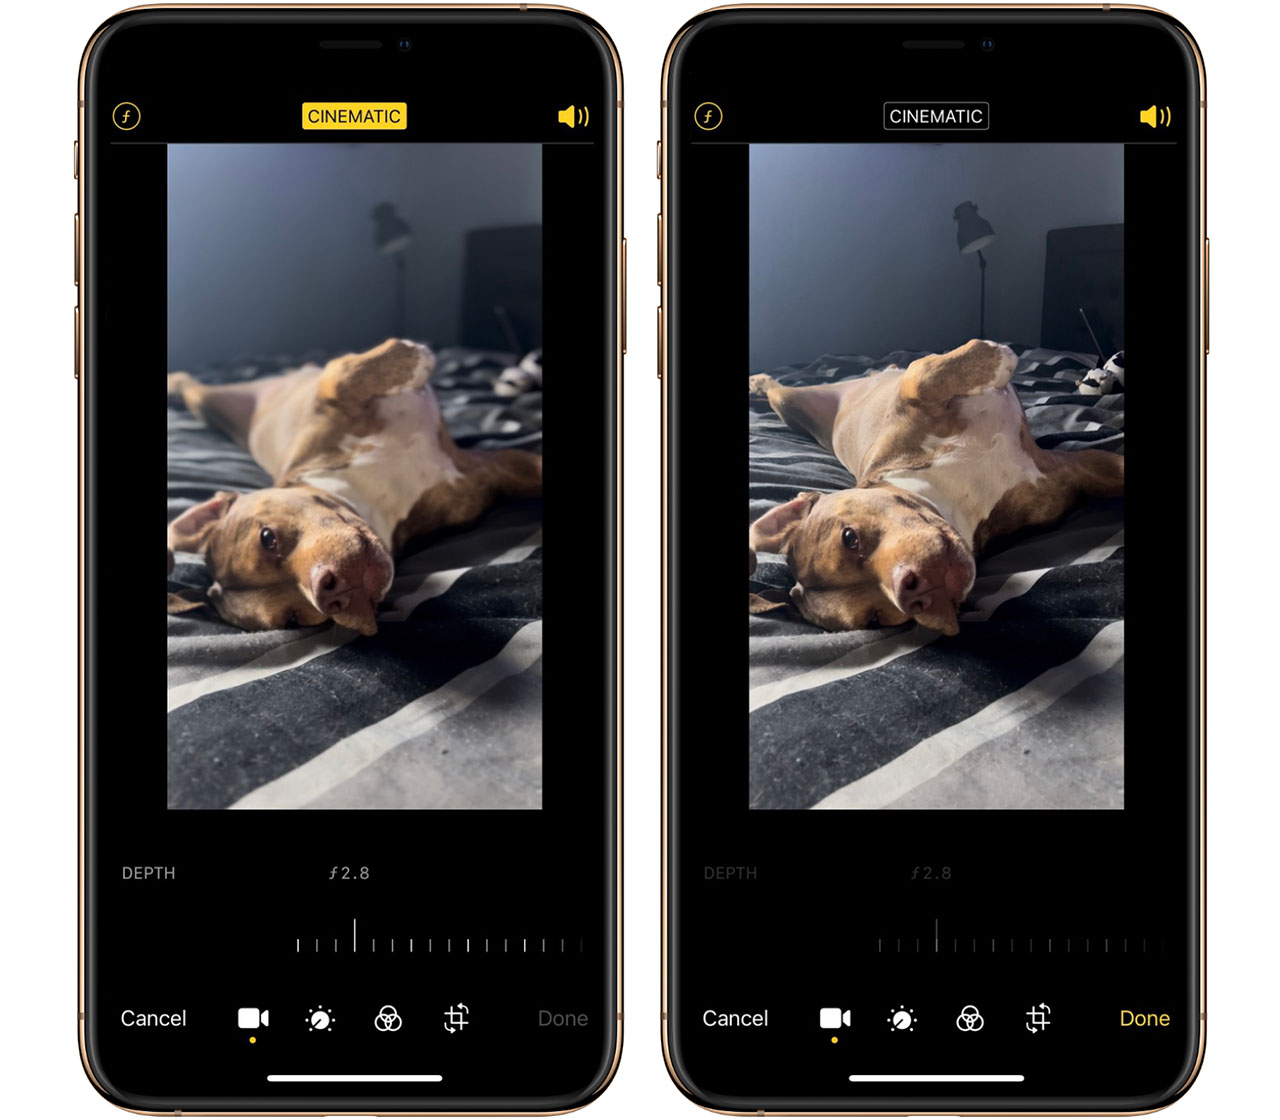
- Find the Cinematic recording you would like to adjust in the photos app
- Tap edit in the top right-hand corner
- Tap on the ƒ button in the top left-hand corner to bring up the bokeh slider
- Adjust the bokeh effect by using the slider in the lower third of your screen
To remove the bokeh effect after recording in Cinematic Mode, tap on the yellow Cinematic button at the top of the screen.
Suppose you want to edit Cinematic Mode video on another device. In that case, you must either use AirDrop or iCloud Photos and use one of the following devices running iOS 15 or later:
- iPhone XS, iPhone XR, and later
- iPad Pro 12.9-inch (3rd generation and later)
- iPad Pro 11-inch (1st generation and later)
- iPad Air (3rd generation and later)
- iPad mini (5th generation and later)
Apple says macOS will support editing Cinematic Mode video in a future macOS update.
There are some limitations

Perhaps most important to note is Cinematic Mode only works on Apple’s iPhone 13 lineup. This includes the iPhone 13, iPhone 13 mini, iPhone 13 Pro, and iPhone 13 Pro Max. If you have an older iPhone, even an iPhone 12 Pro running iOS 15, you will not see this feature in your camera app. Cinematic Mode is also limited to 1080p HD recording at 30 frames per second (fps).
For the vast majority of iPhone users, this quality limitation won’t be an issue. However, hard-core video buffs who want to get the best possible quality likely won’t want to use Cinematic mode.
As mentioned earlier, Cinematic Mode can use the 1x wide-angle lens and the 3x telephoto lens but not the 0.5x ultra-wide-angle lens. This means if you have an iPhone 13 or iPhone 13 mini, you will only be able to record at 1x, where if you have an iPhone 13 Pro or iPhone 13 Pro Max, you’ll be able to pick between 1x and 3x.
MobileSyrup may earn a commission from purchases made via our links, which helps fund the journalism we provide free on our website. These links do not influence our editorial content. Support us here.
