
As the PlayStation 5’s game catalogue continues to grow by the week, you might find yourself running short on storage space. With more games and plenty of content in the pipeline, now is an ideal time to upgrade. Adding a bigger SSD to your PlayStation 5 allows you to store a greater number of games and content.
If you are considering moving forward with the process of upgrading the PS5’s storage space, you’ll need a specific NVMe M.2 SSD drive and a little technical know-how to access the inside of the PS5 hardware.
I’ve created a guide to help with the process, from picking the correct drive and opening your console to installing and formatting the SSD. First, let’s look at the NVMe M.2 SSDs that are compatible with the PlayStation 5.
What is an NVMe M.2 SSD?
 You can’t use just any drive to upgrade the PS5’s internal storage; it requires a NVMe SSD (Non-Volatile Memory Express Solid-State Drive). This high-performance storage device is designed for use in computing systems like the PS5, PC and beyond.
It utilizes the NVMe protocol, which allows for faster data read and write speeds than traditional SATA drives by connecting directly to the PCIe bus on the motherboard. The PS5’s hardware architecture is designed around the blazingly fast speeds that the NVMe M.2 provides, so it’s required for an internal upgrade. You can use traditional external USB storage for legacy PS4 games, but the NVMe M.2 is required for all PS5 titles.
What type of NVMe SSD should I buy?
 Sony has kept the choices a little wider when it comes to the brand and make you can purchase for the console. There is no proprietary hardware like what’s required by the Xbox Series X/S consoles; instead, you can choose from a wide variety of models from various manufacturers. The requirements come down to a heatsink, the physical size of the SSD, and a baseline read speed of 5,500MB/s or faster is recommended. More information can be found here.
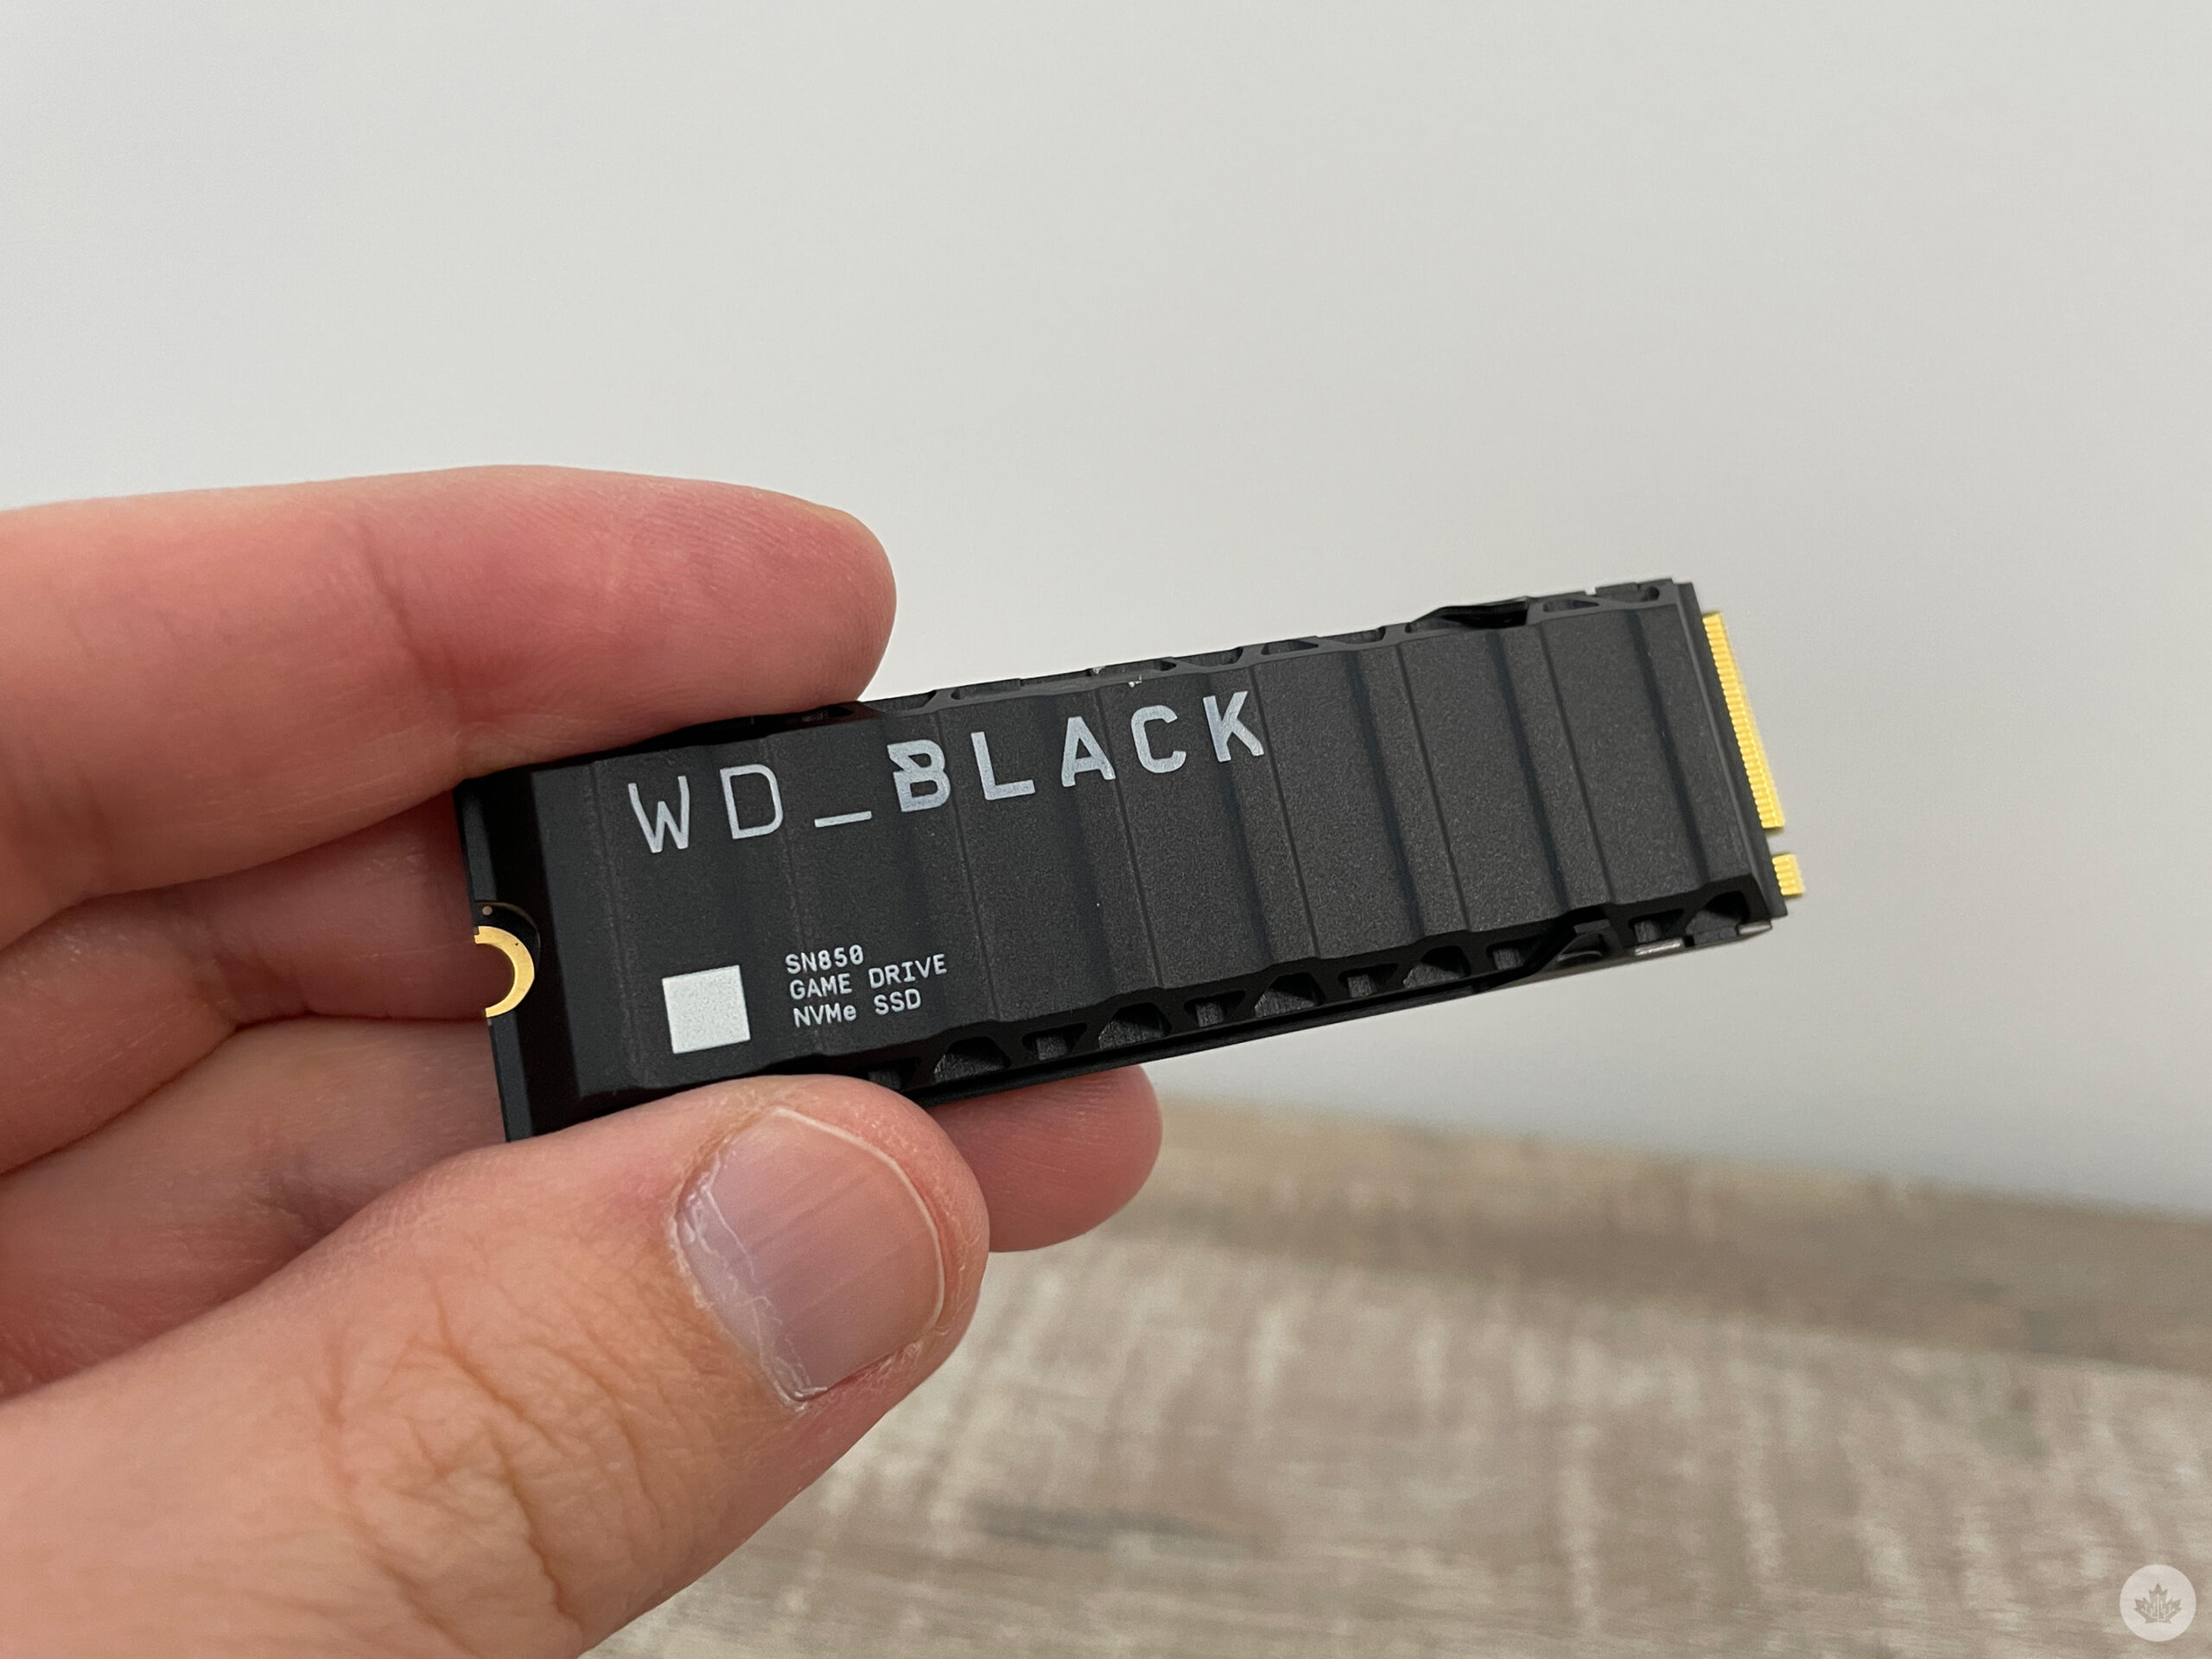
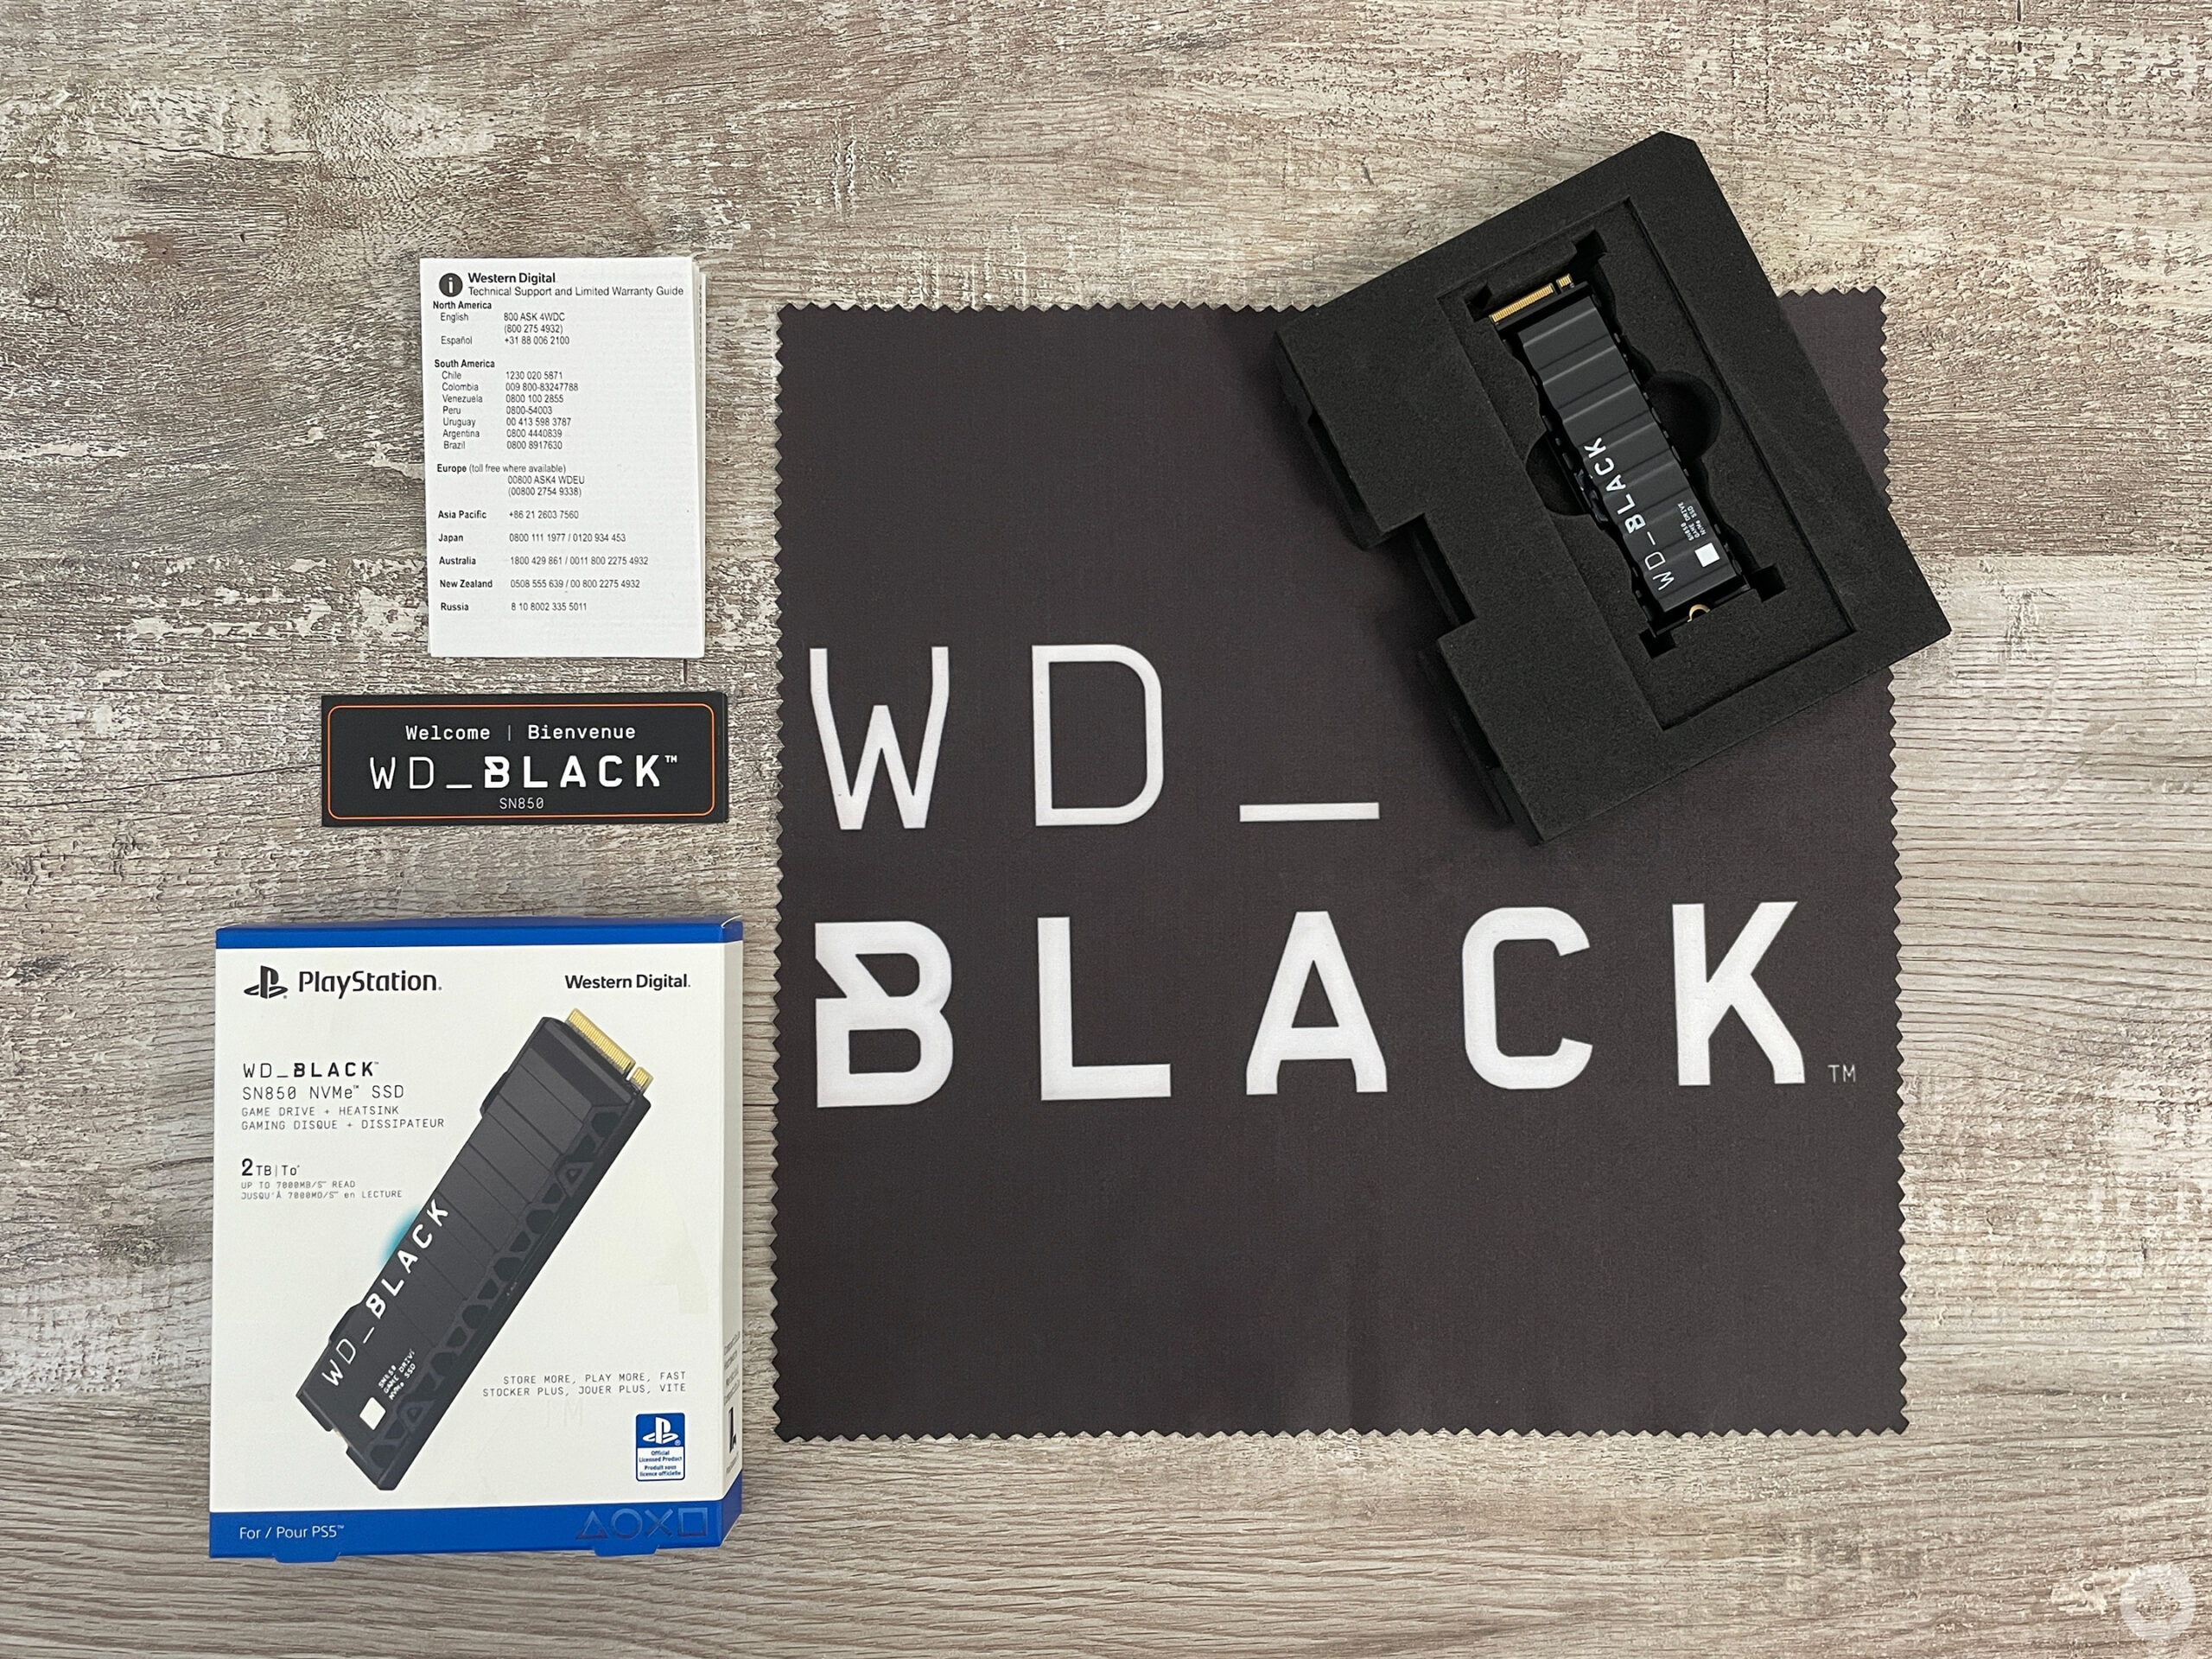
You can also buy an NVMe SSD without a heatsink and install it yourself to save a little money. If you’re looking to take all the guesswork out of the process, PlayStation teamed up with Western Digital to offer an “officially licensed” SSD in the WD_BLACK SN850 model. It includes a heatsink and is the only officially supported option out there that carries the PlayStation branding.
For the purpose of this guide, I will be using the 2TB option of the WD_BLACK SN850.
Preparing for Installation
In this step-by-step guide, I’ll be walking you through how to install an NVMe SSD in your PlayStation 5 disc, or digital version console.
Step 1 — Update your PS5’s system software
The first step is to ensure your PlayStation 5’s system software is up to date. Make sure you have the latest version installed before you begin this process, or the drive might not be recognized after installation.
Step 2 — Gather tools for the install process
While you wait for the update, be sure to gather the tools you’ll need for the installation:
- #1 Phillips screwdriver
- Soft cloth
- Large, sturdy surface to work on
- Flashlight (optional if you are in a well-lit room)
Step 3 — Shutdown console and remove the plastic shell
After the software update is complete, fully shut down your system and disconnect all cables before removing the console’s exterior shell or trying to access the inside of the hardware. Next, remove the console’s stand and lay it flat with the PlayStation logo facing down and the PlayStation console’s power button facing away from you.
Before starting the next set of steps, touch a grounded piece of metal to remove any static electricity from your hands.
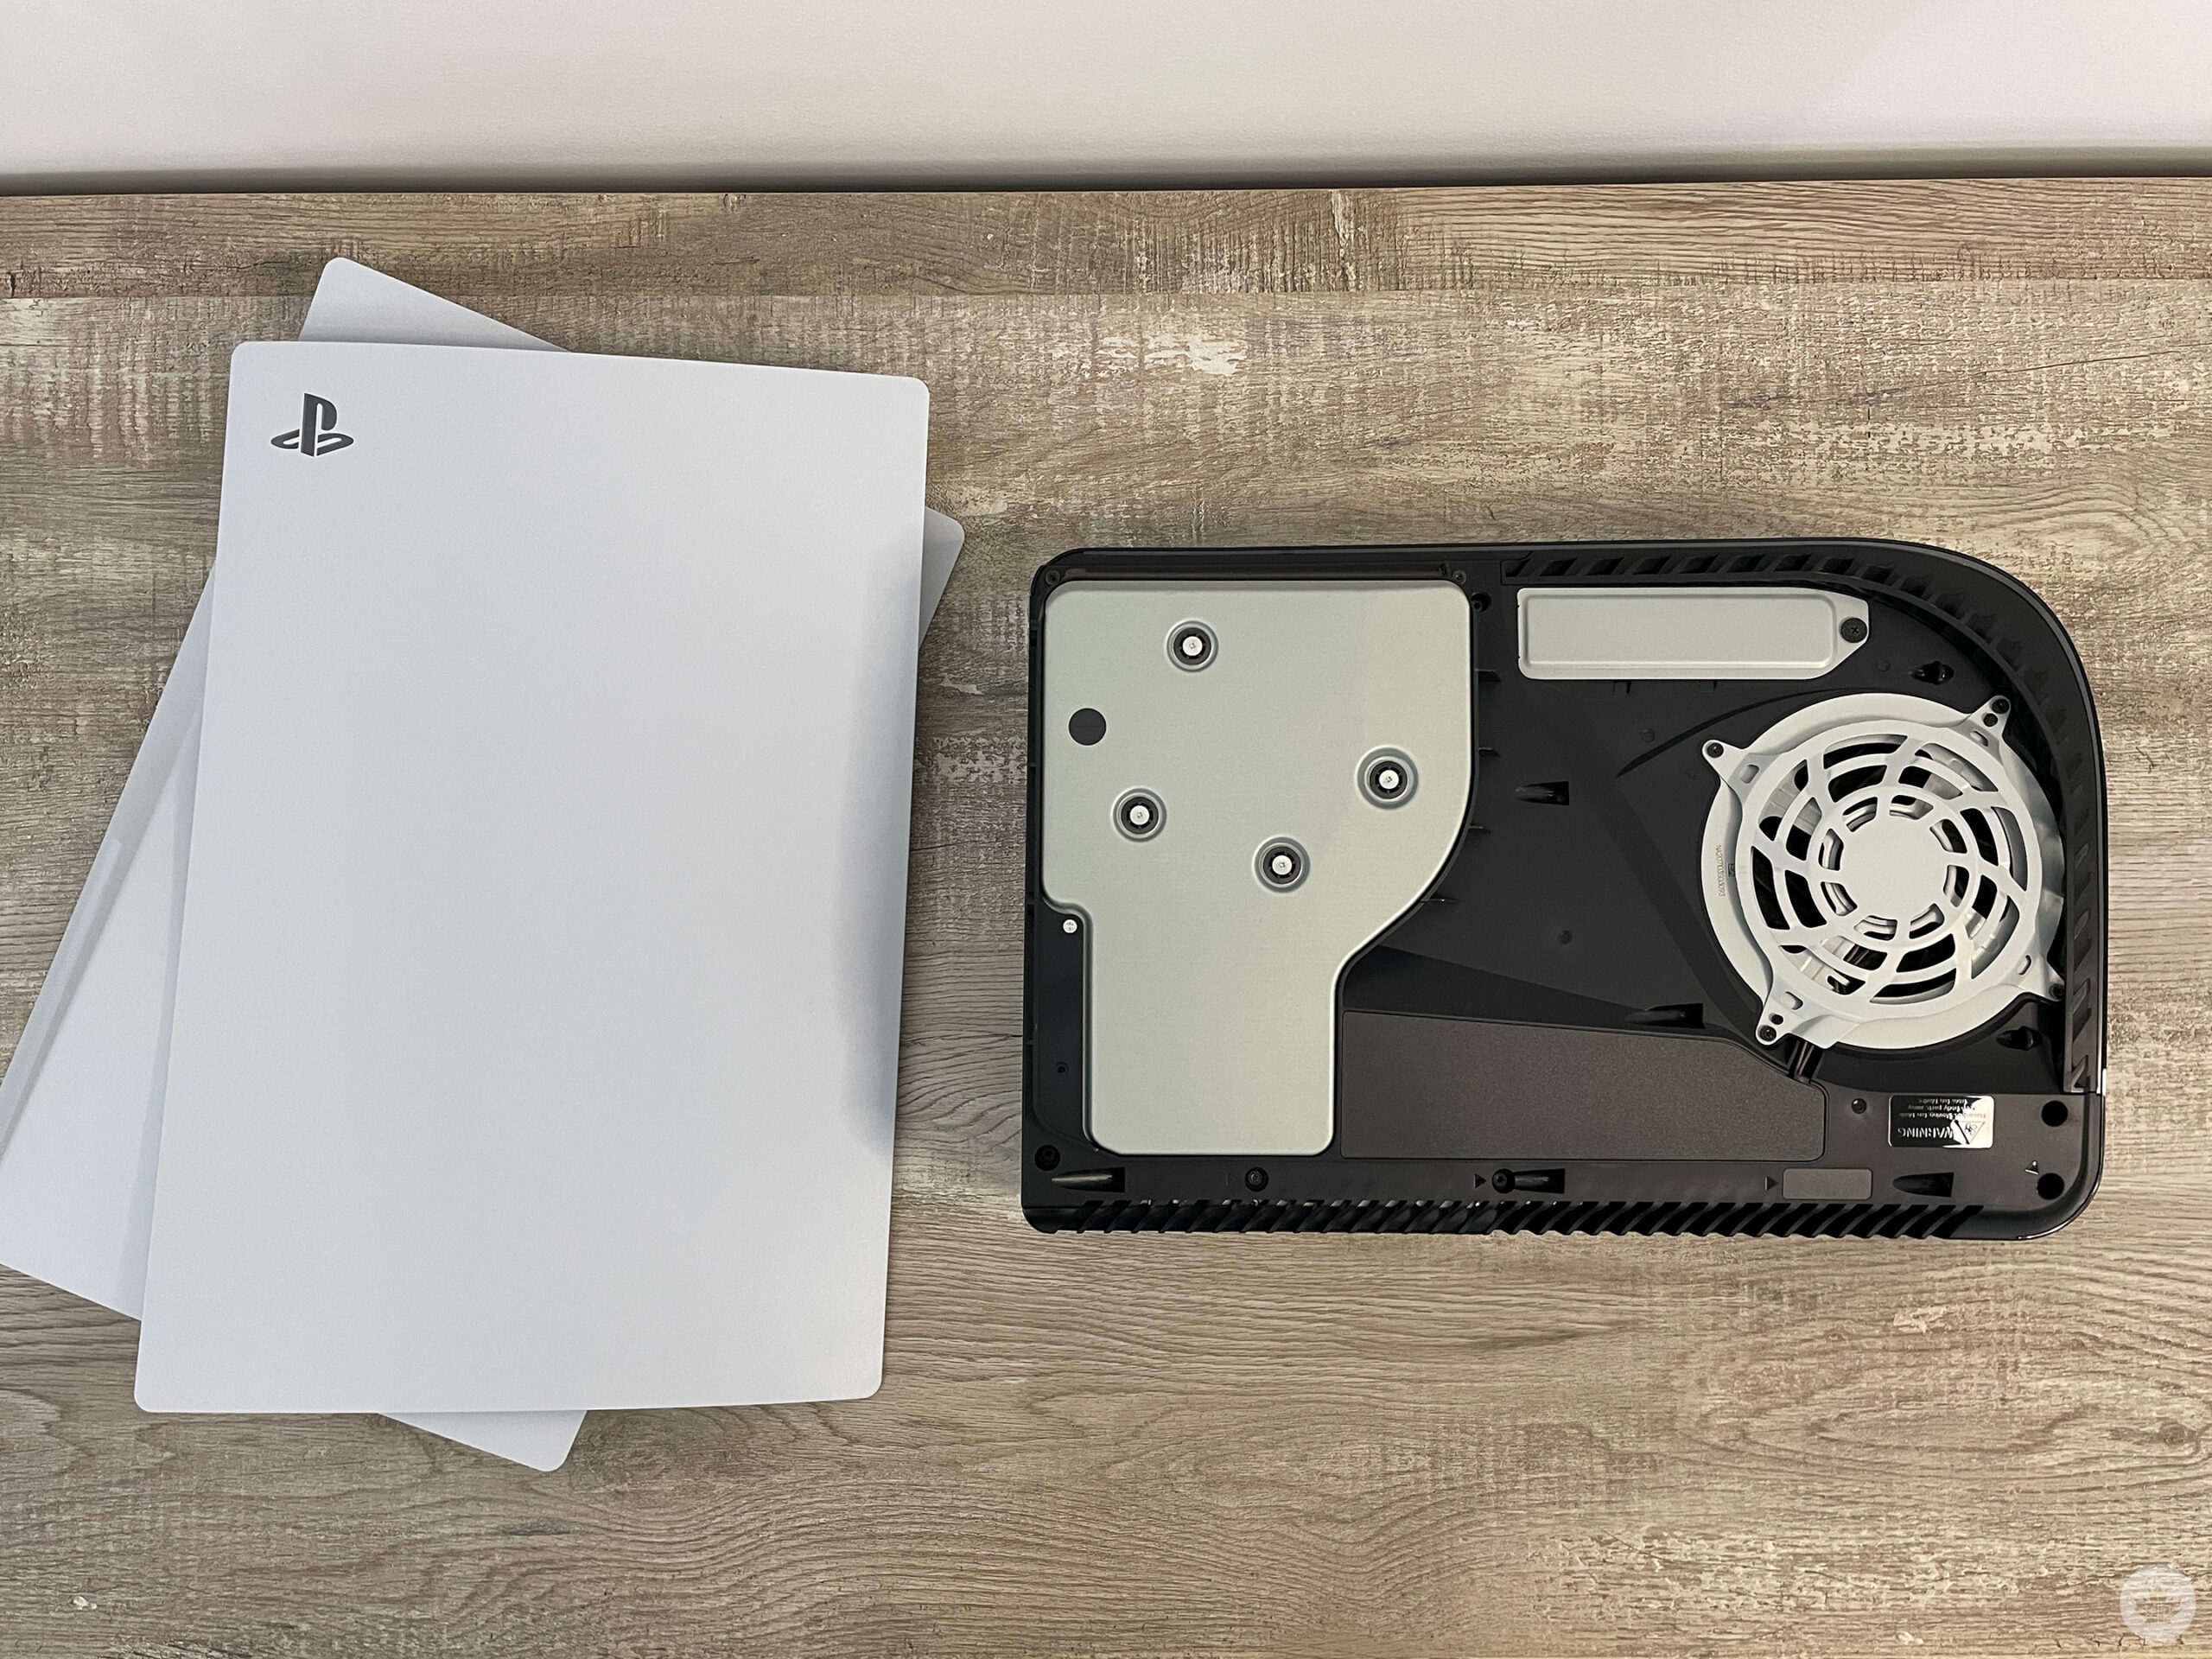
Step 4 — Remove the cover shell
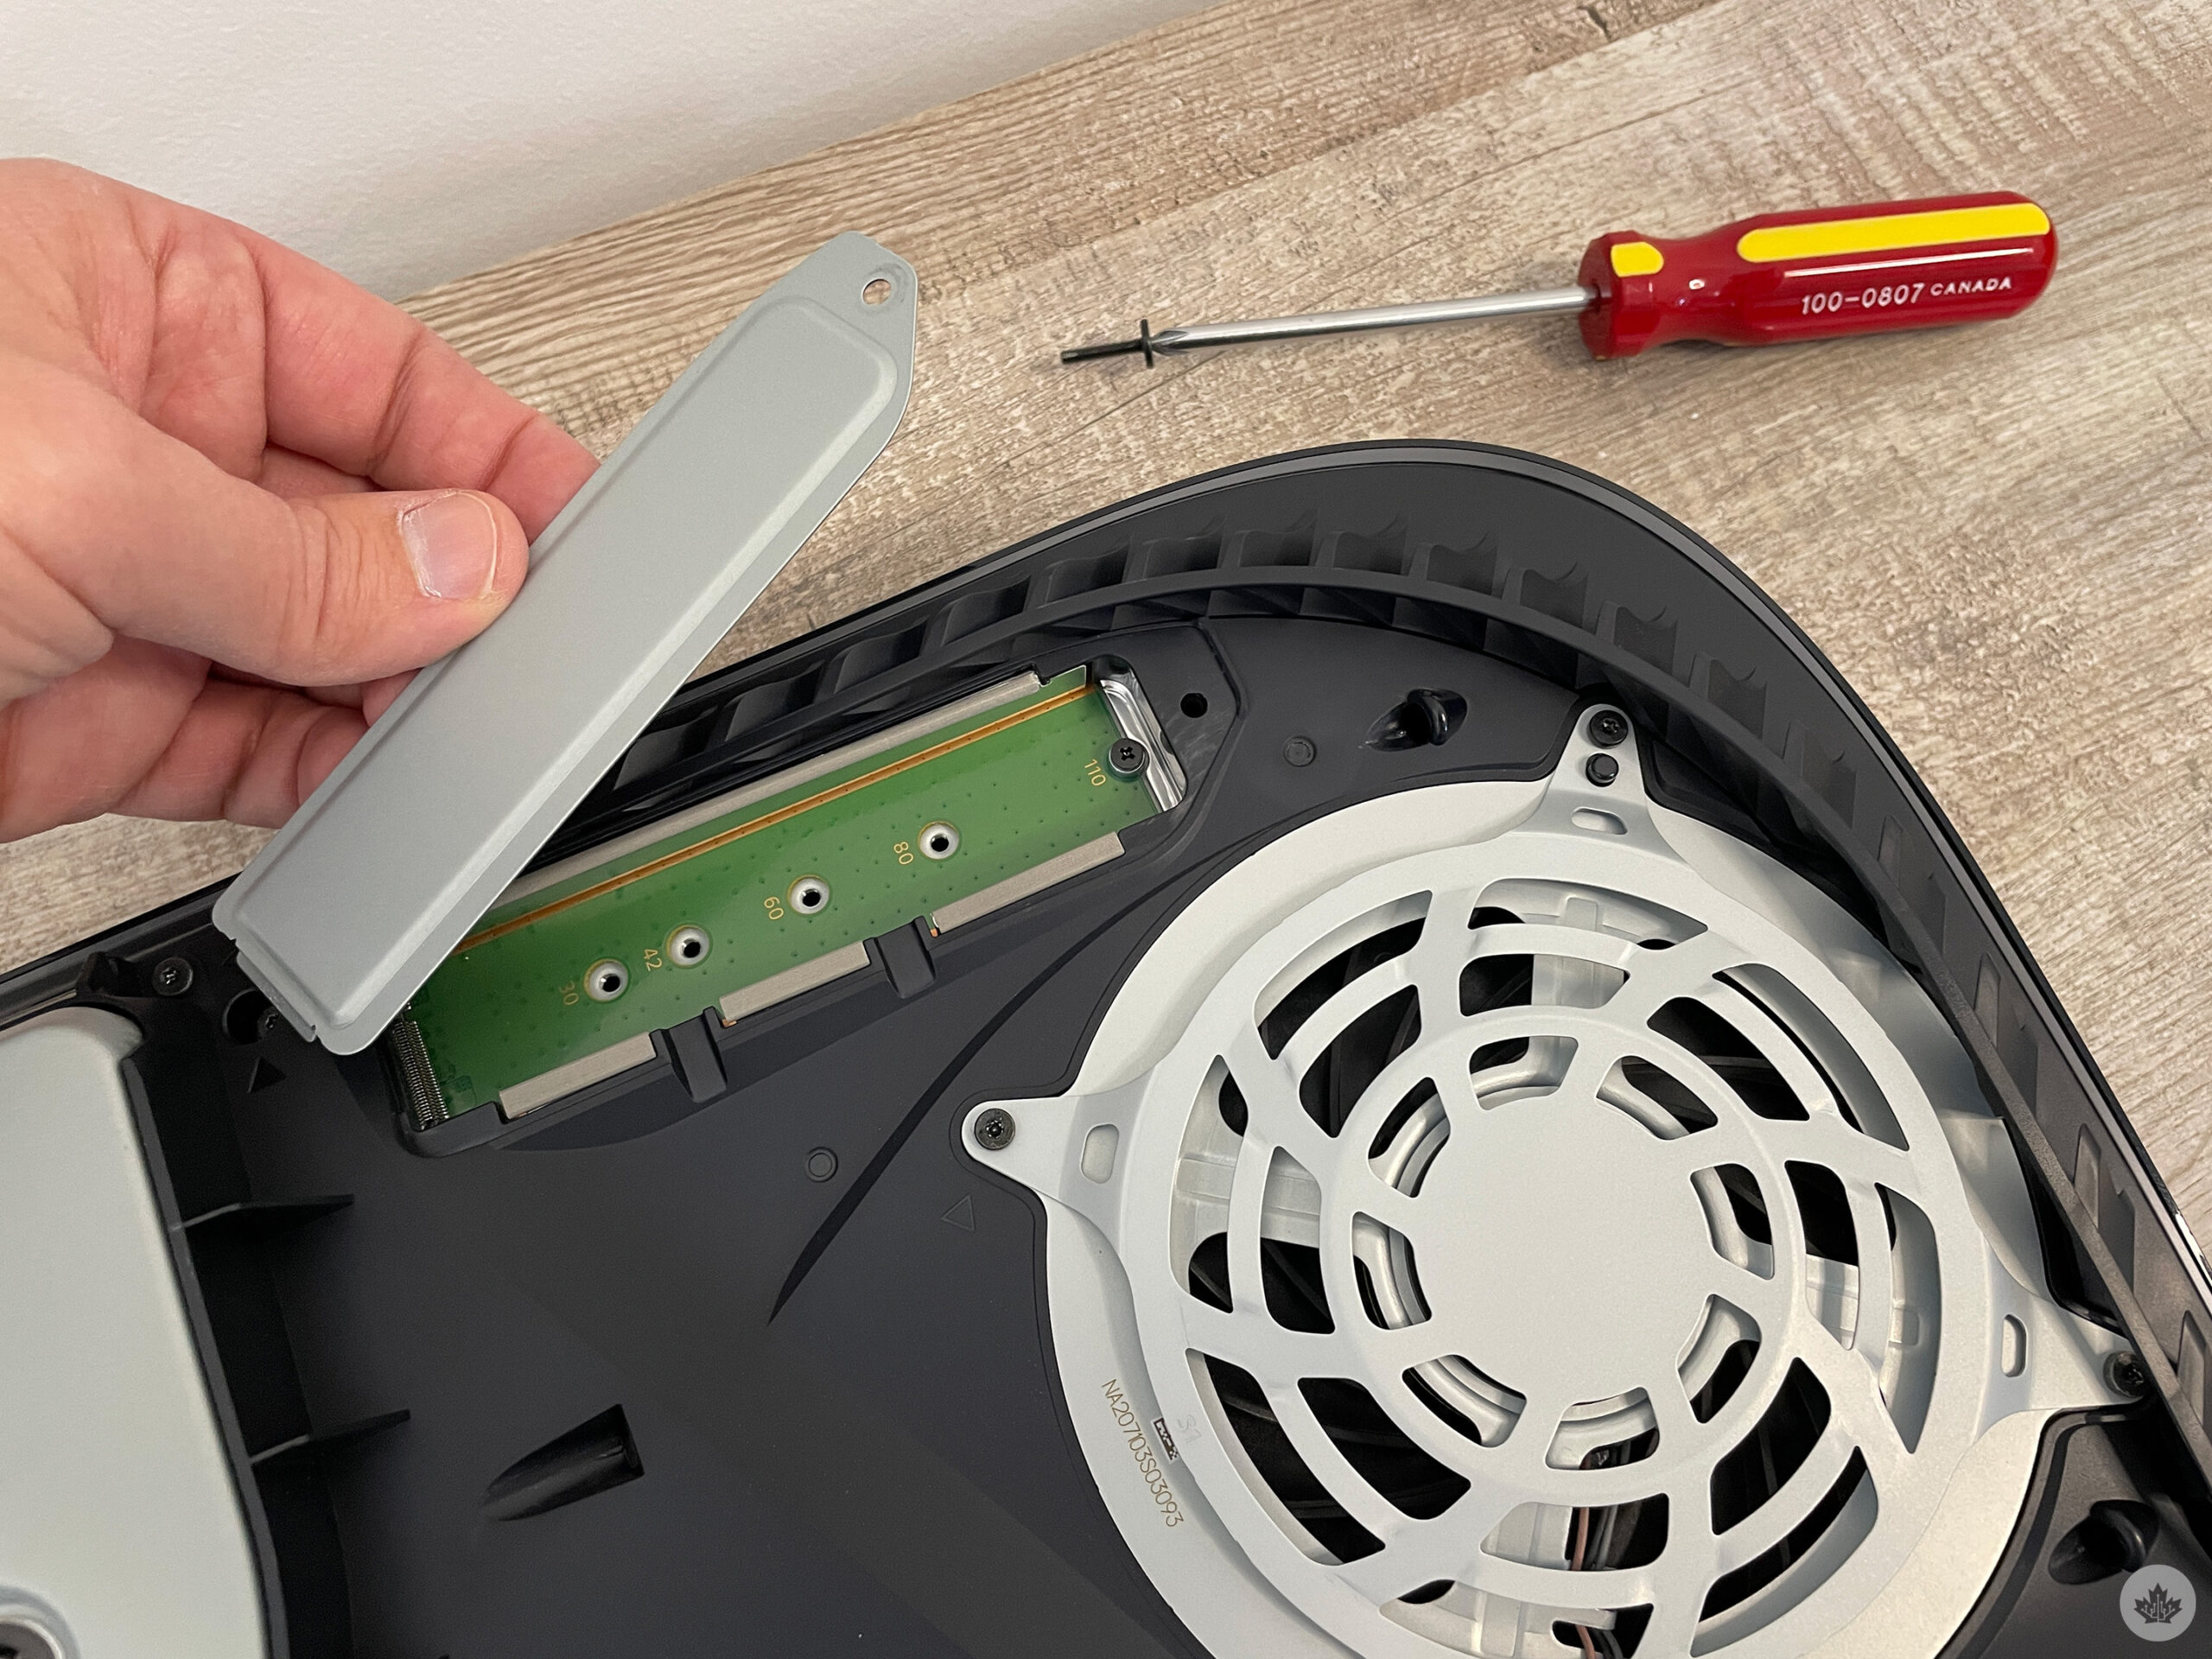
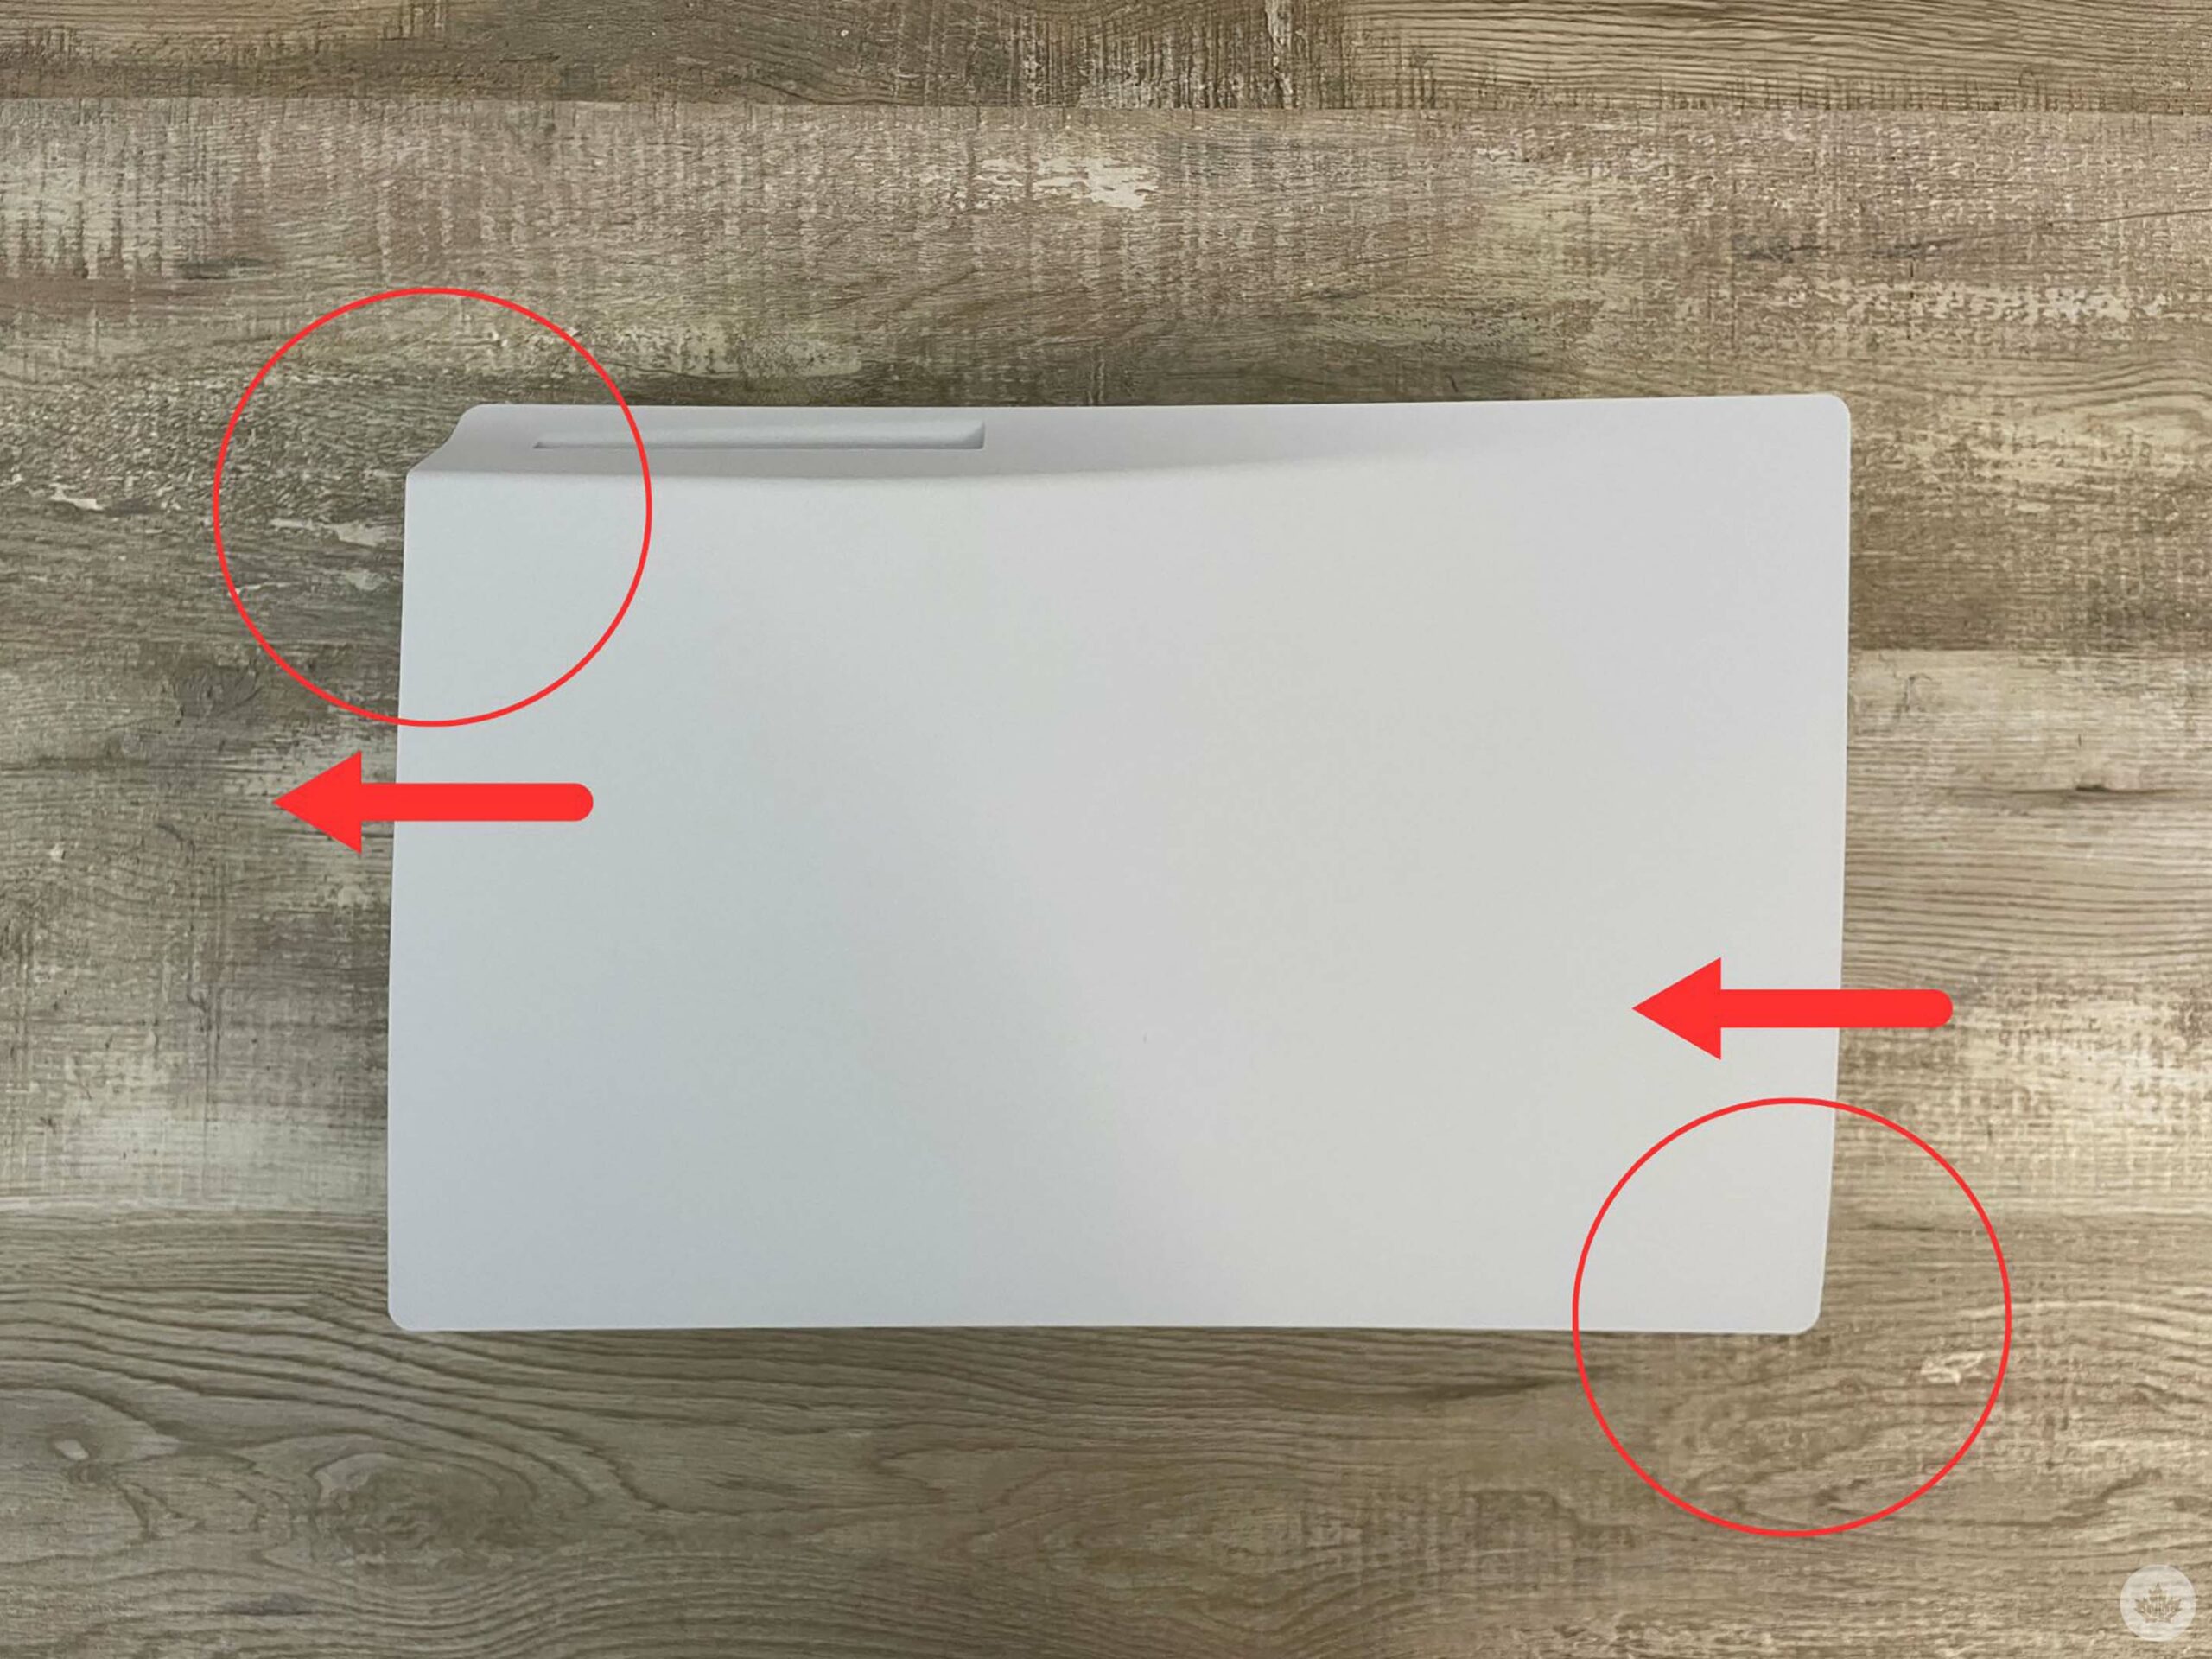 To access the SSD slot, you must first remove the PS5 cover shell. Gently push the backside of the cover down and then slide it upwards. Removing the shell for the first time can be hard, so just be patient and don’t use excessive force. Once the cover is off, the innards of the console are exposed. At this stage, you’ll want to locate the light grey expansion cover.
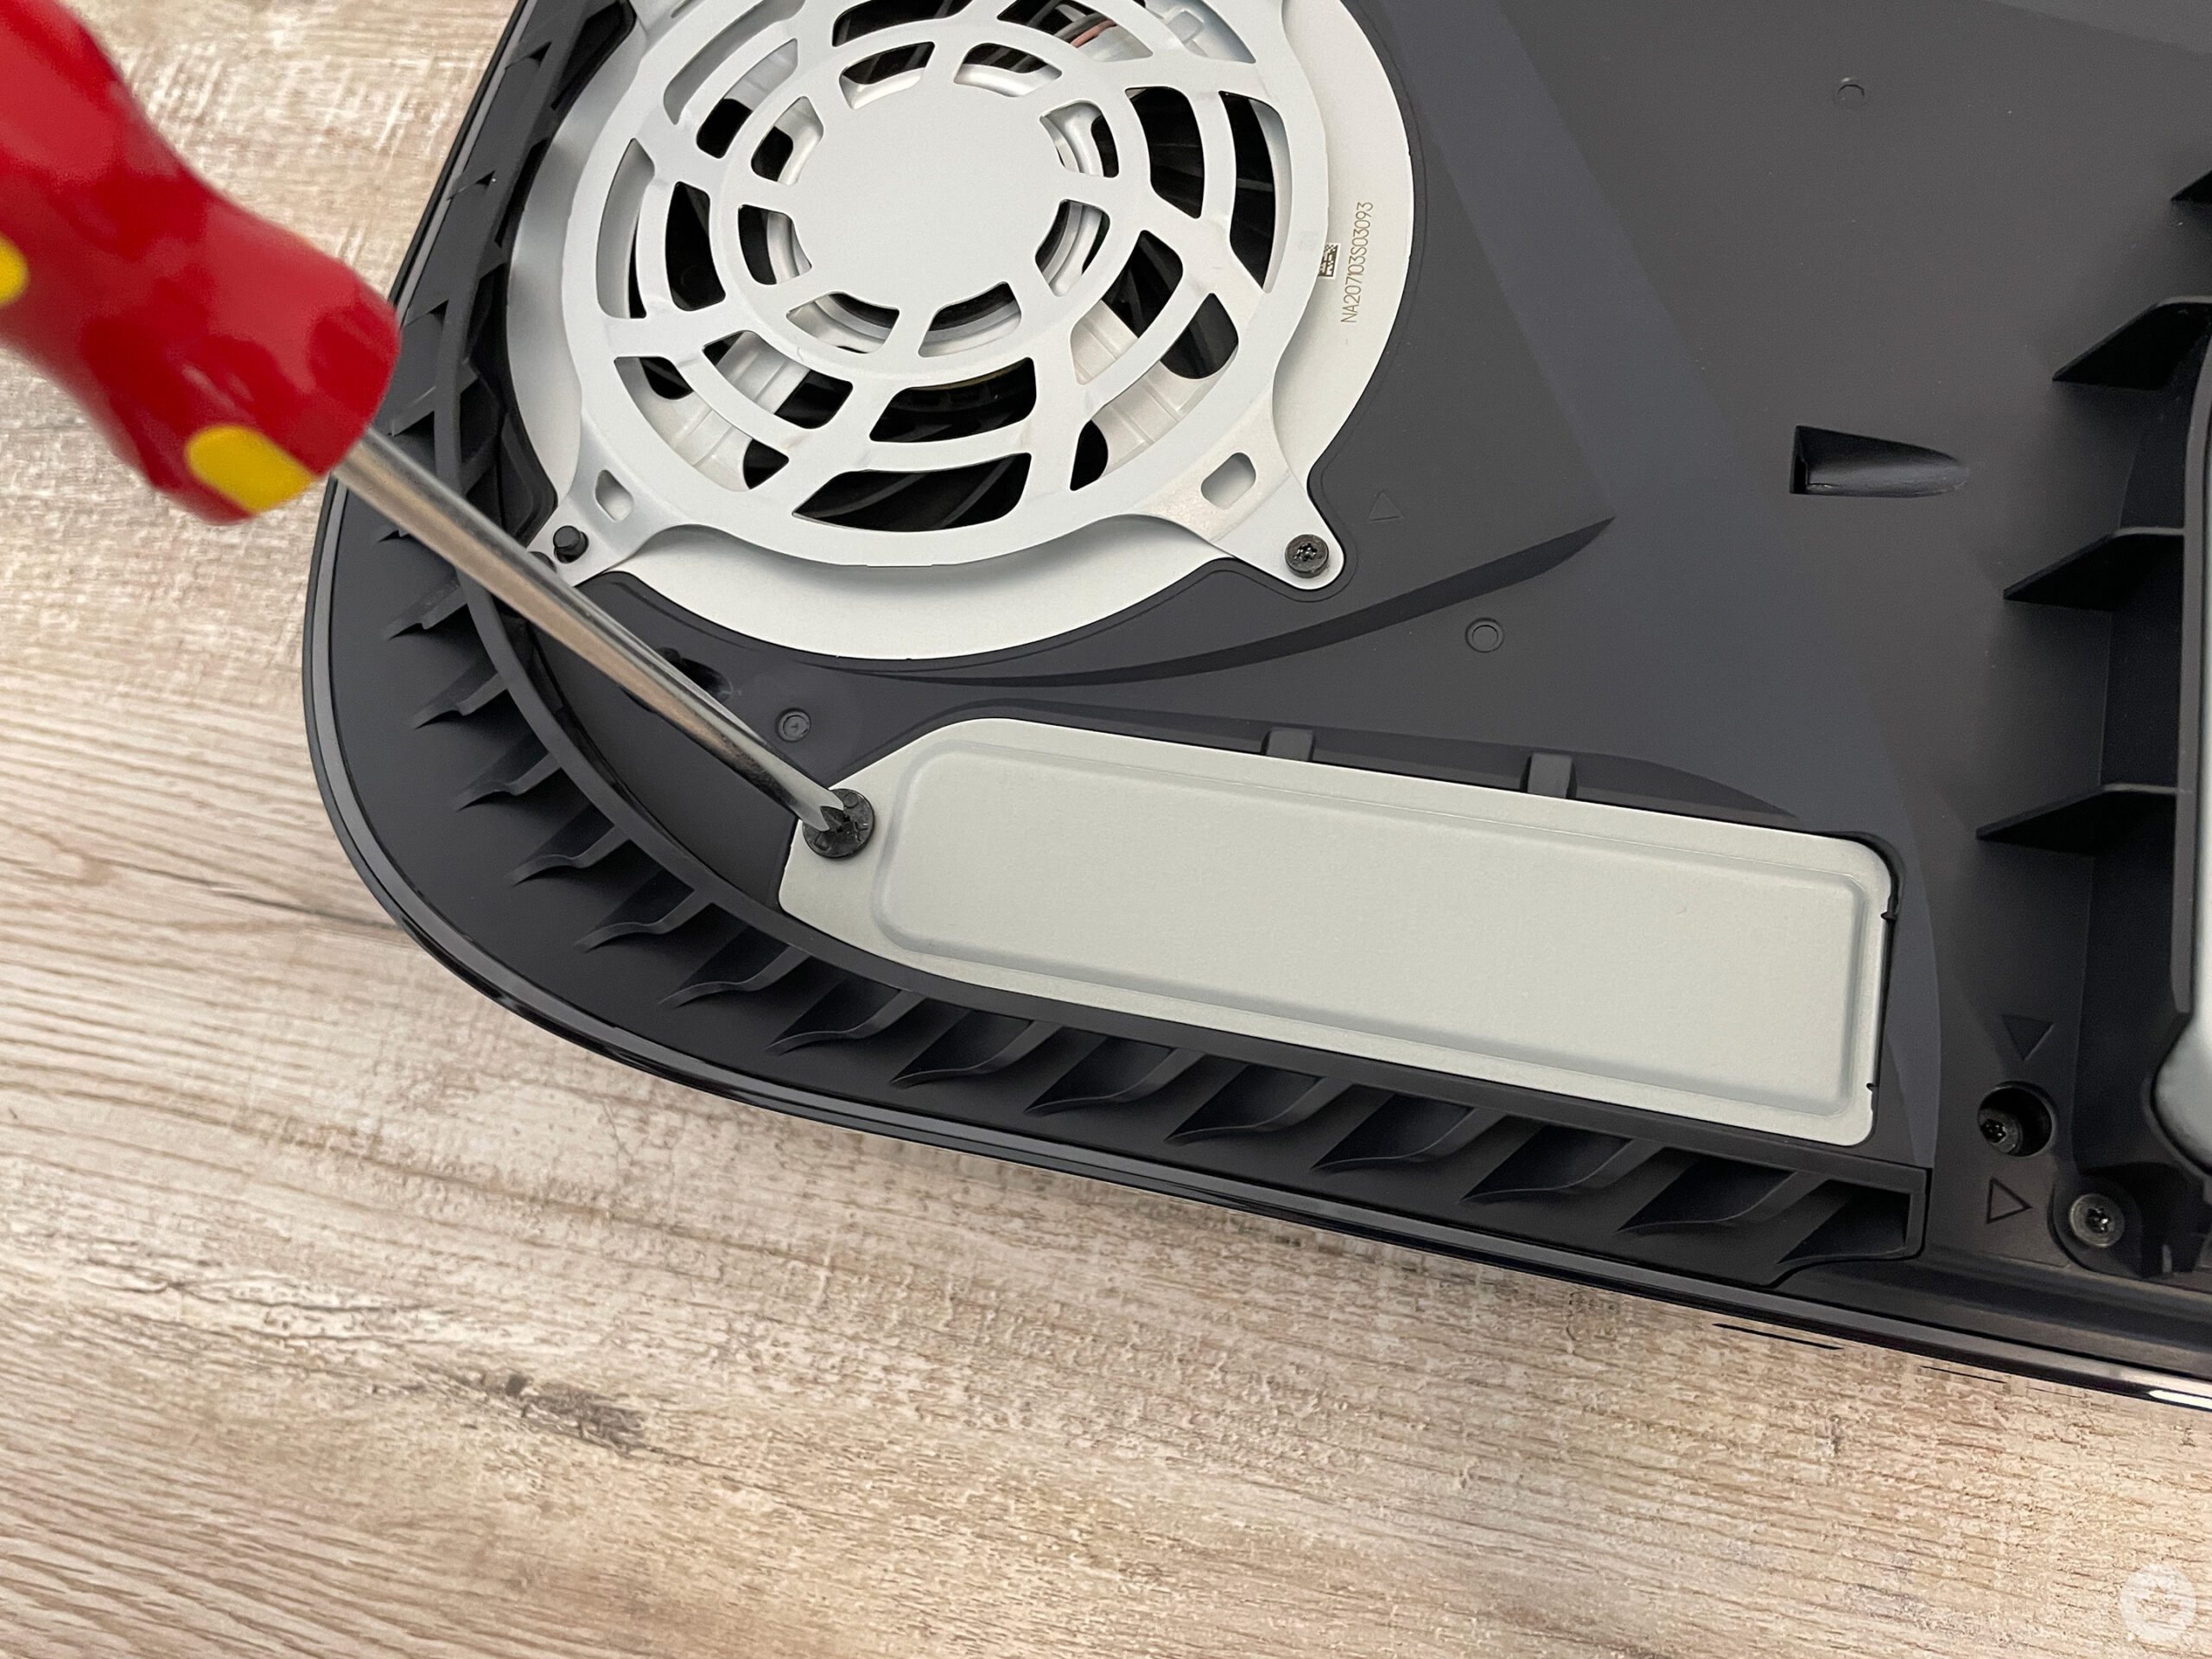
Step 5 — Open the expansion cover
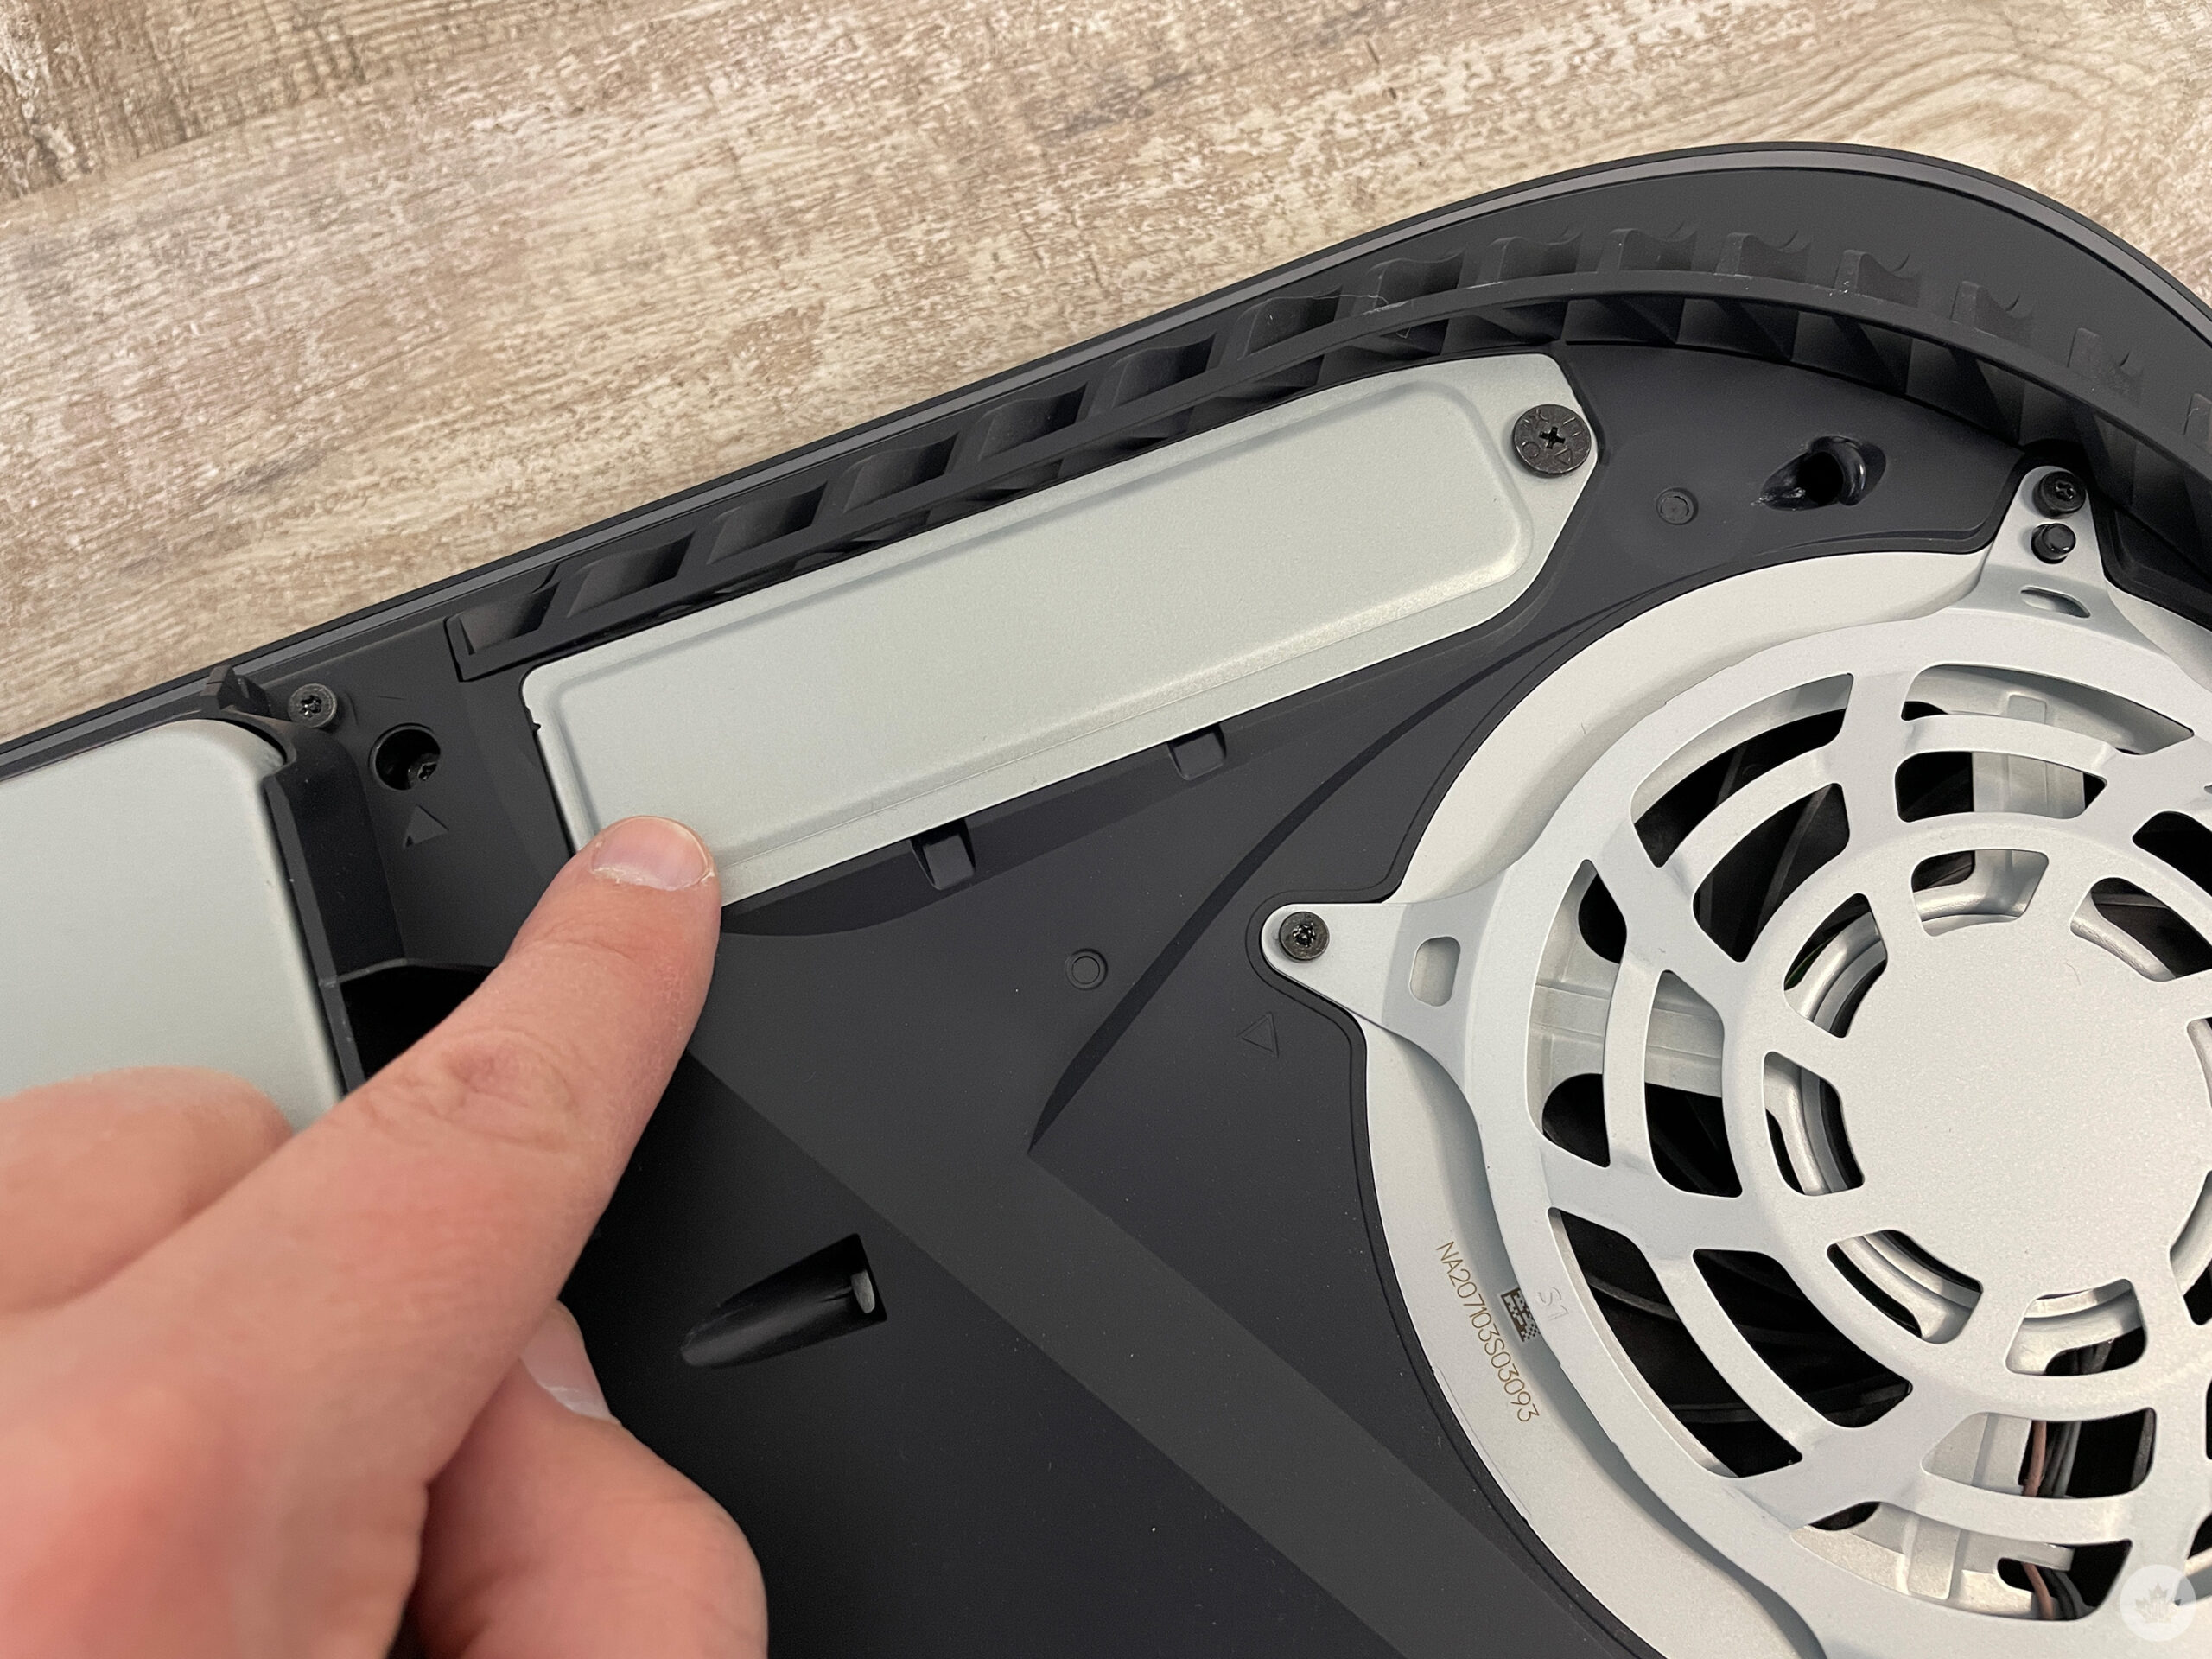 Use a Philips Screwdriver to unscrew and lift away the cover. Be careful not to strip the screw and make sure you are using the correct size tool. If the screwdriver isn’t turning the screw, double-check the size. Once the screw is removed, put it aside and be very careful not to drop it into any open areas of the PS5’s exposed innards.
Step 6 — Preparing the expansion slot for the SSD module
 Once the cover is removed, you’ll see a green area with five expansion screw holes. Inside this space, you’ll also find another screw which you’ll need to remove along with its spacer.
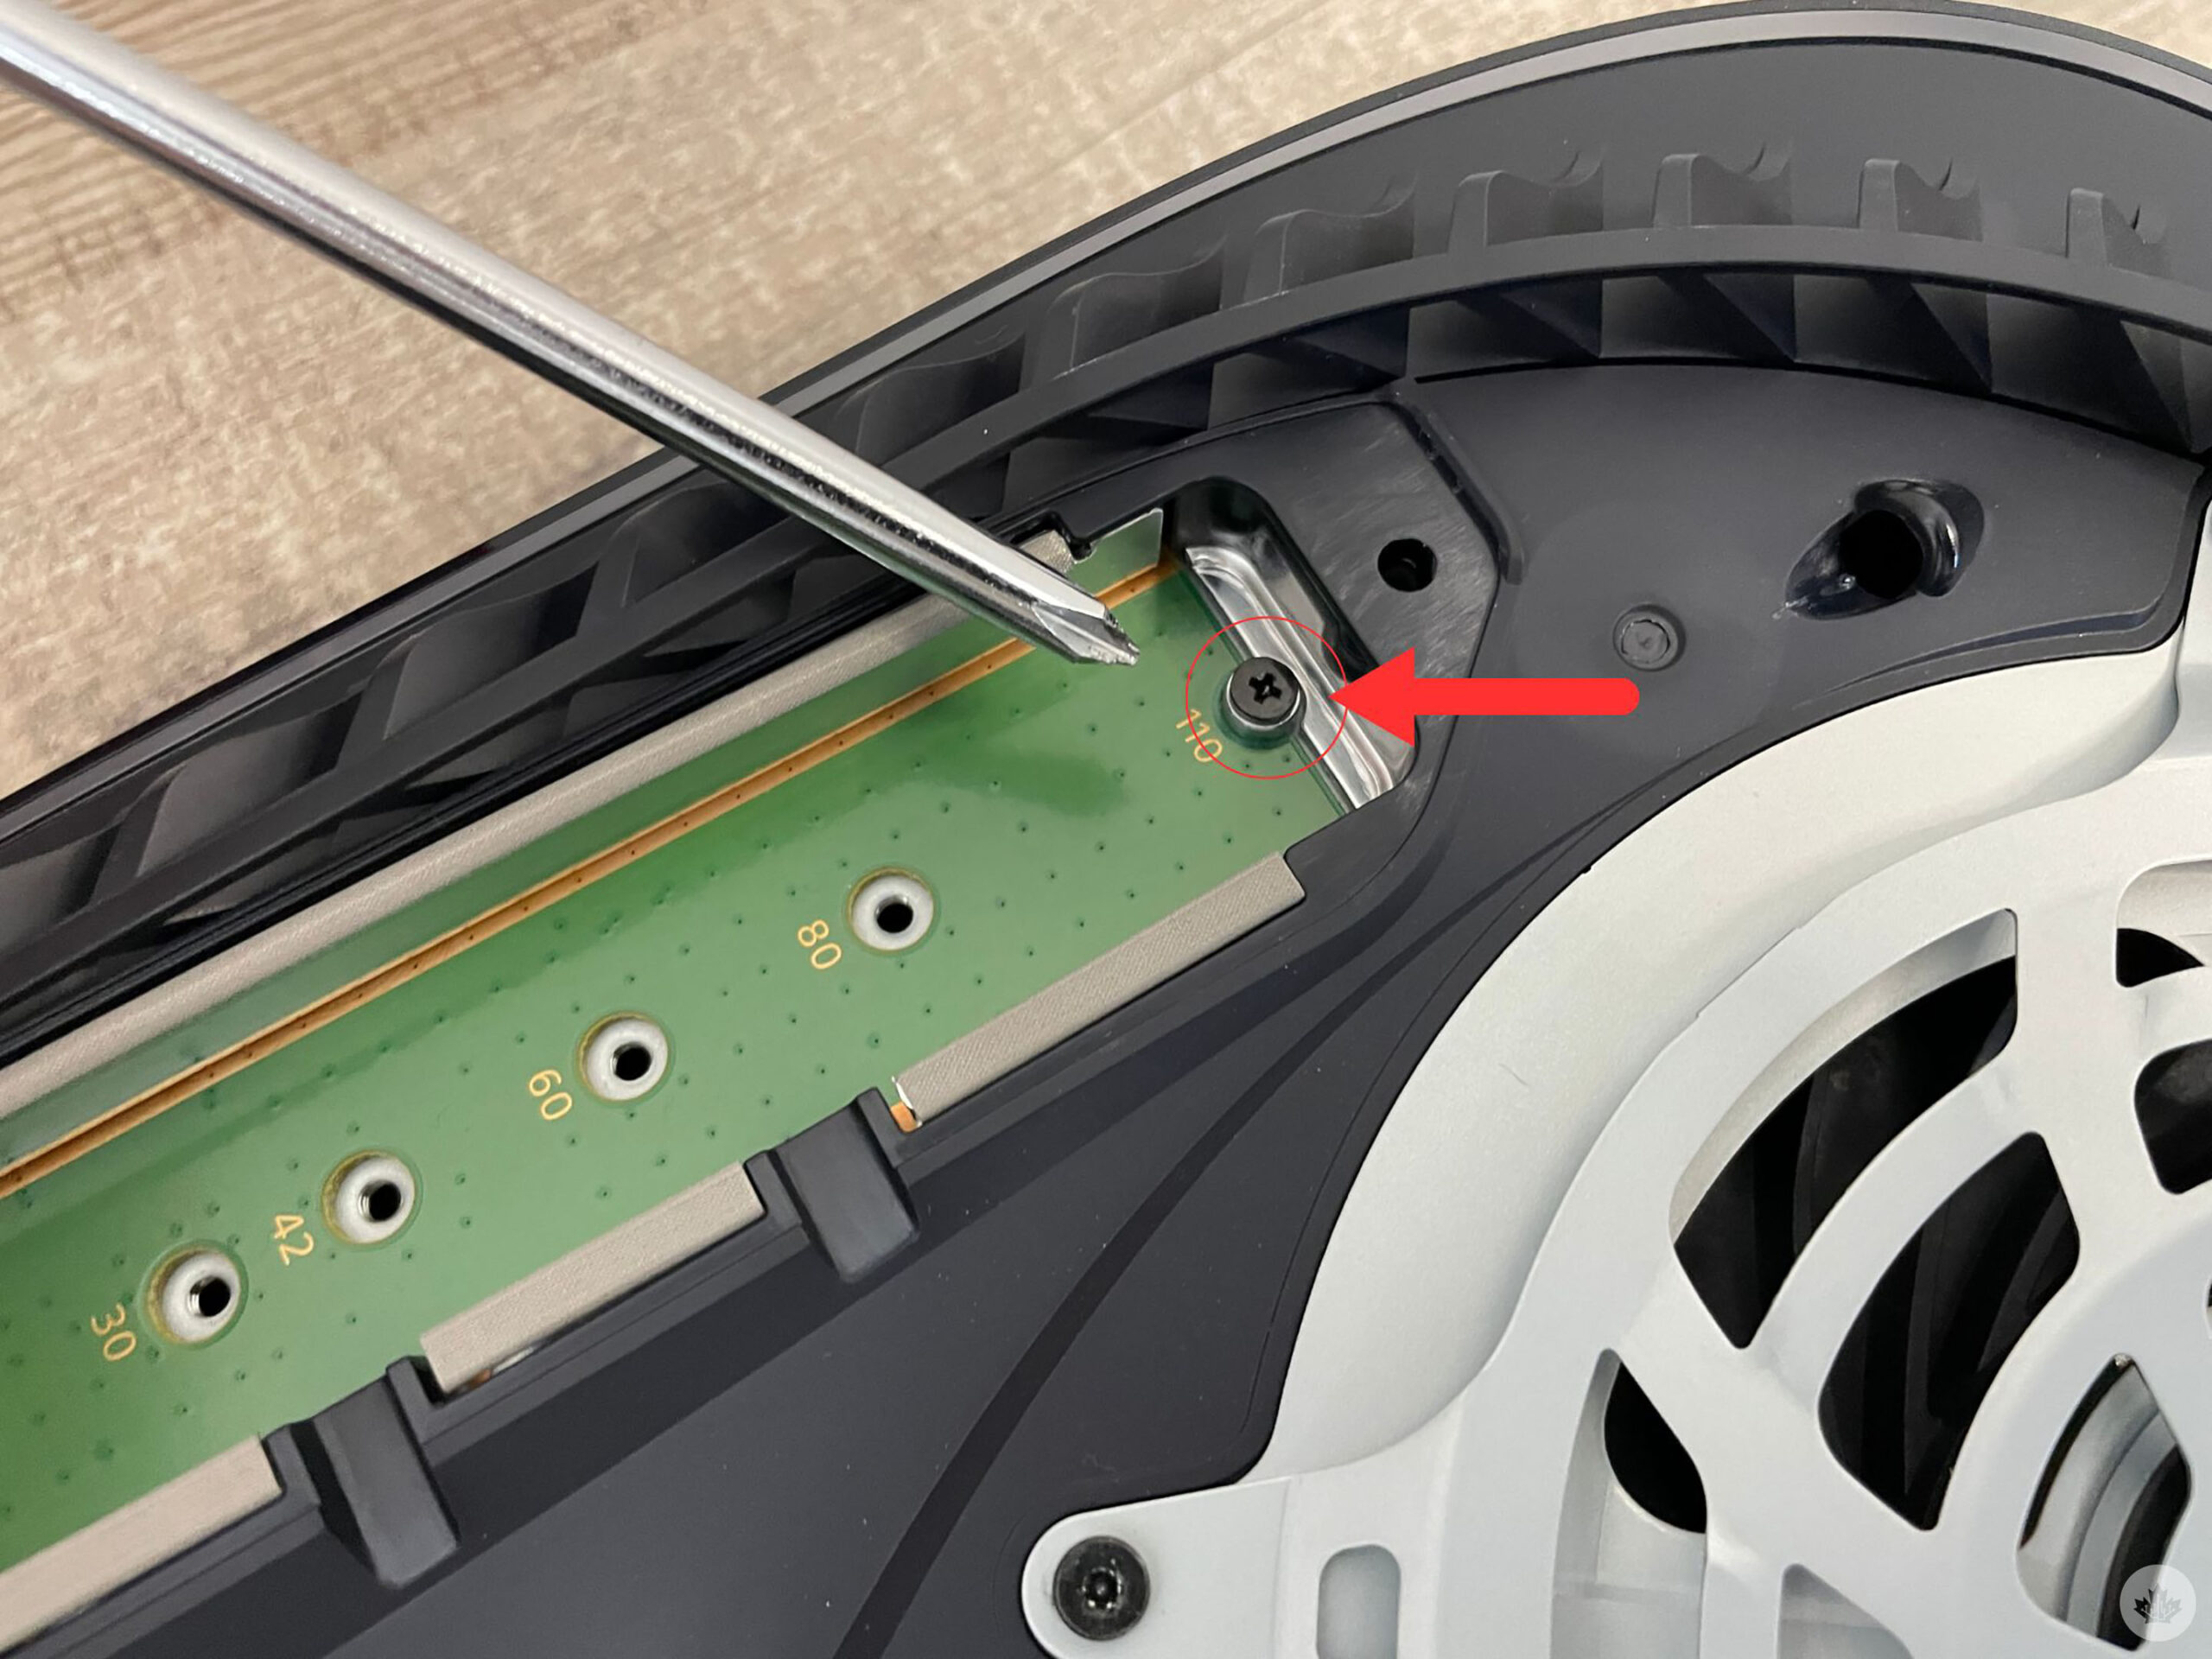 This screw and spacer combo will secure your SSD in place once it’s been inserted.
Step 7 — Install the NVMe SSD
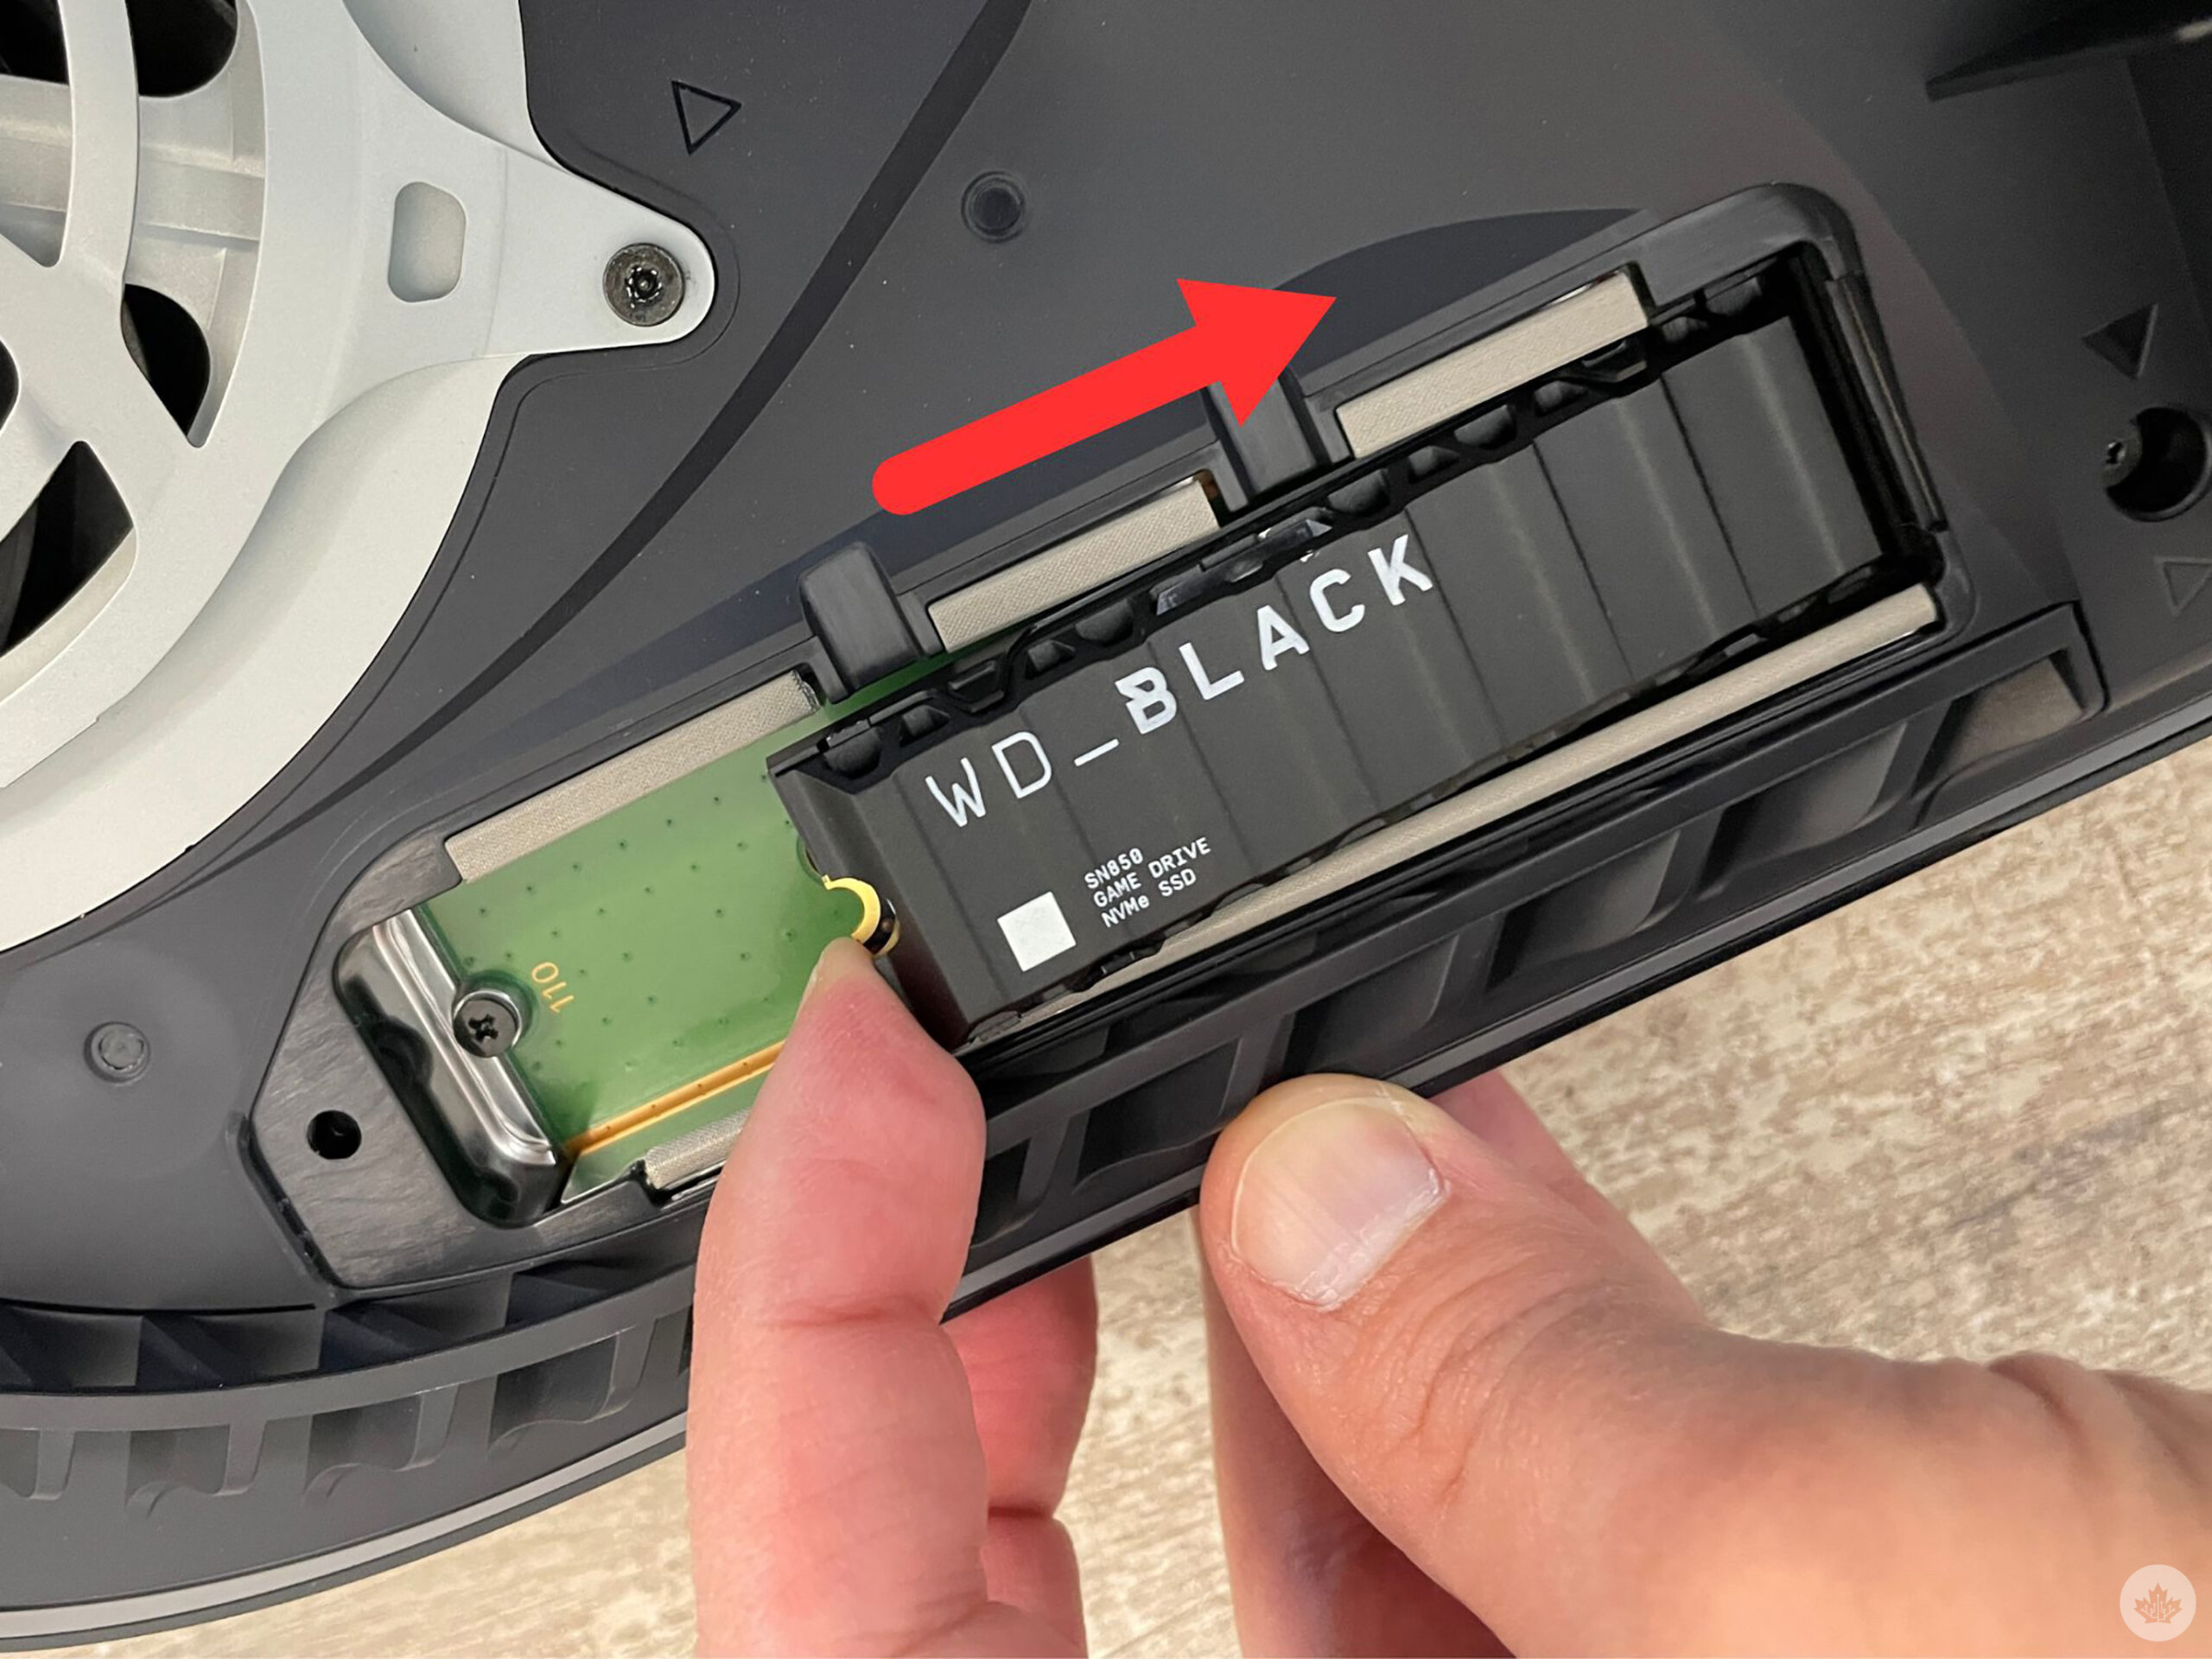 Carefully insert the NVMe SSD into the terminal slot, making sure to line up the pins correctly. Gently push the SSD into the connection area at an angled position. Once it’s seated properly, firmly insert it all the way into the port.
Step 8 — Screw the NVMe SSD in place
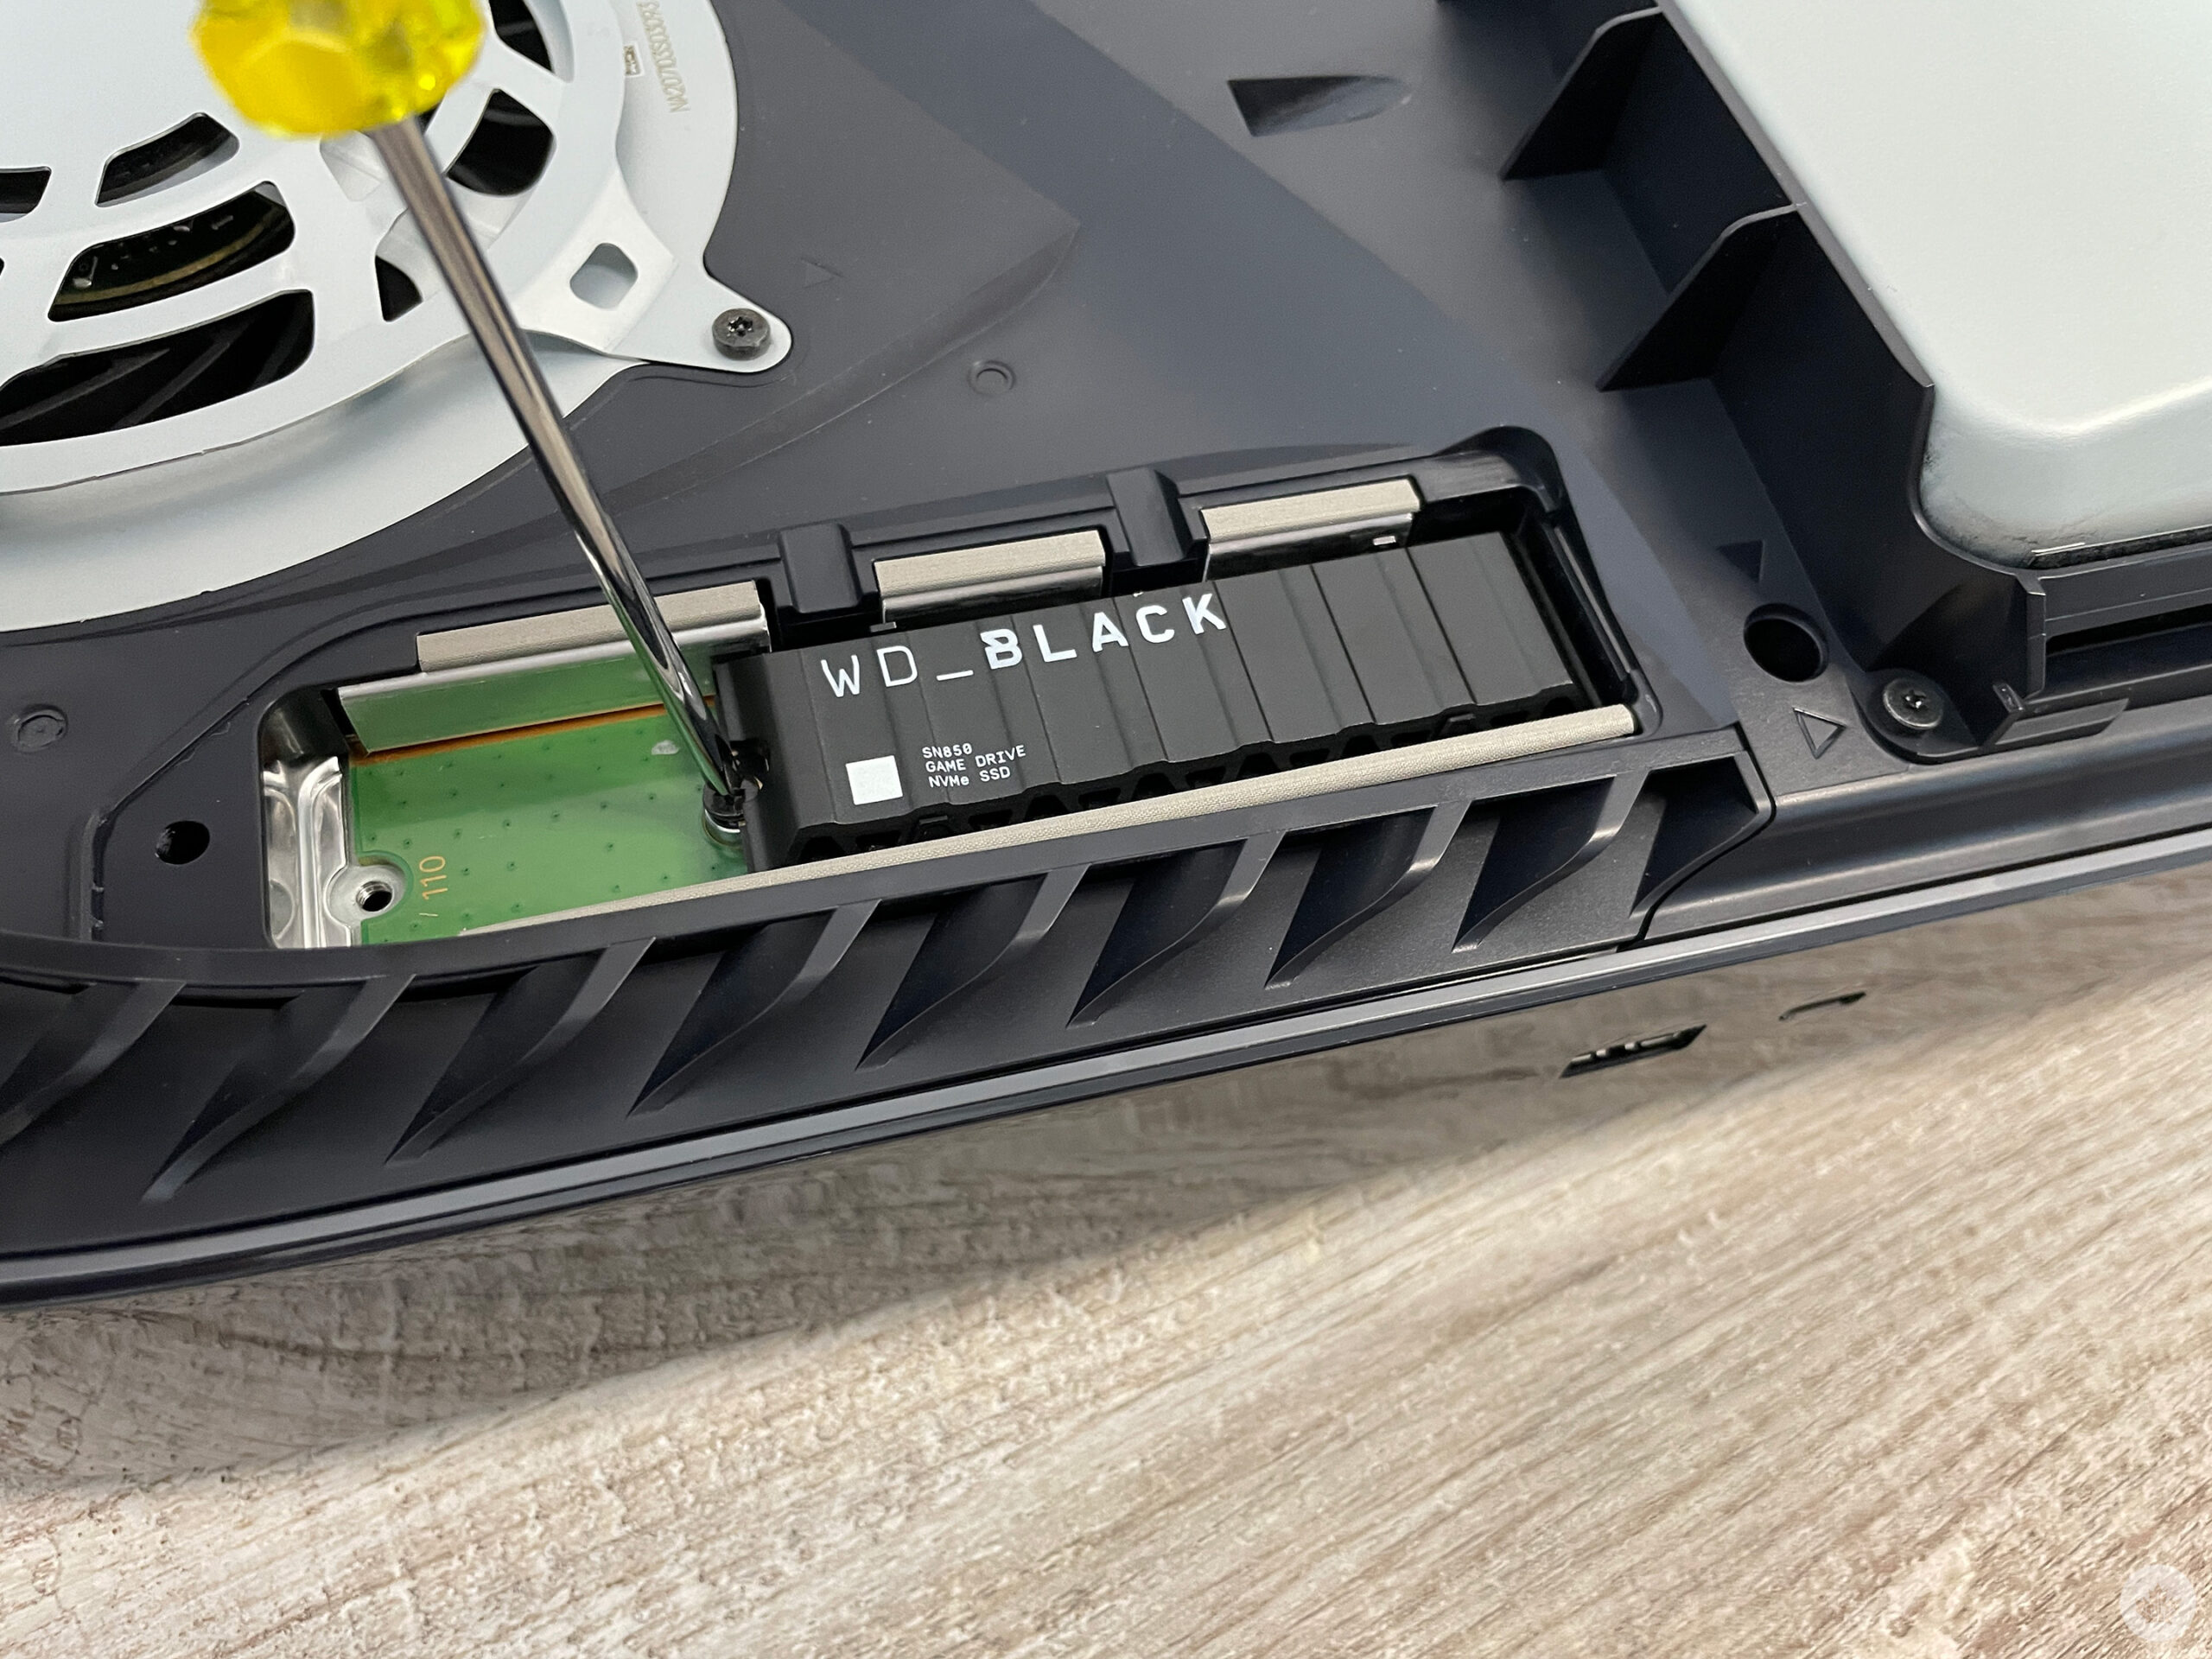 Once the NVMe SSD is correctly connected and inserted in the slot, push it down gently and line it up with the empty screw hole, ensuring the hole is aligned with the top of the SSD. Next, place the spacer inside the screw hole that matches up with the top of the drive. Push the SSD flat and tighten the screw gently into the spacer.
As you tighten the screw, it will pull the SSD flat and secure it in place. Be mindful not to over-tighten because you can strip the screw and damage the SSD or the console.
Step 9 — Re-attach the SSD expansion bay cover
 Once the screw is securely holding the drive in place, you can replace the grey SSD cover. Carefully slide it into place and use the screw to affix it to the hardware. Once again, don’t over-tighten it to avoid stripping the screw.
Step 10 — Put the PS5 cover shells back on
 Now it’s time to re-attach the PS5 cover back on the console, I found this to be the most difficult part of the process. The trick is to position it away from the top edge of the body and slide it down. You’ll hear a loud “click” when the cover is attached properly. This will likely take a few tries; just be patient and don’t aggressively force it.
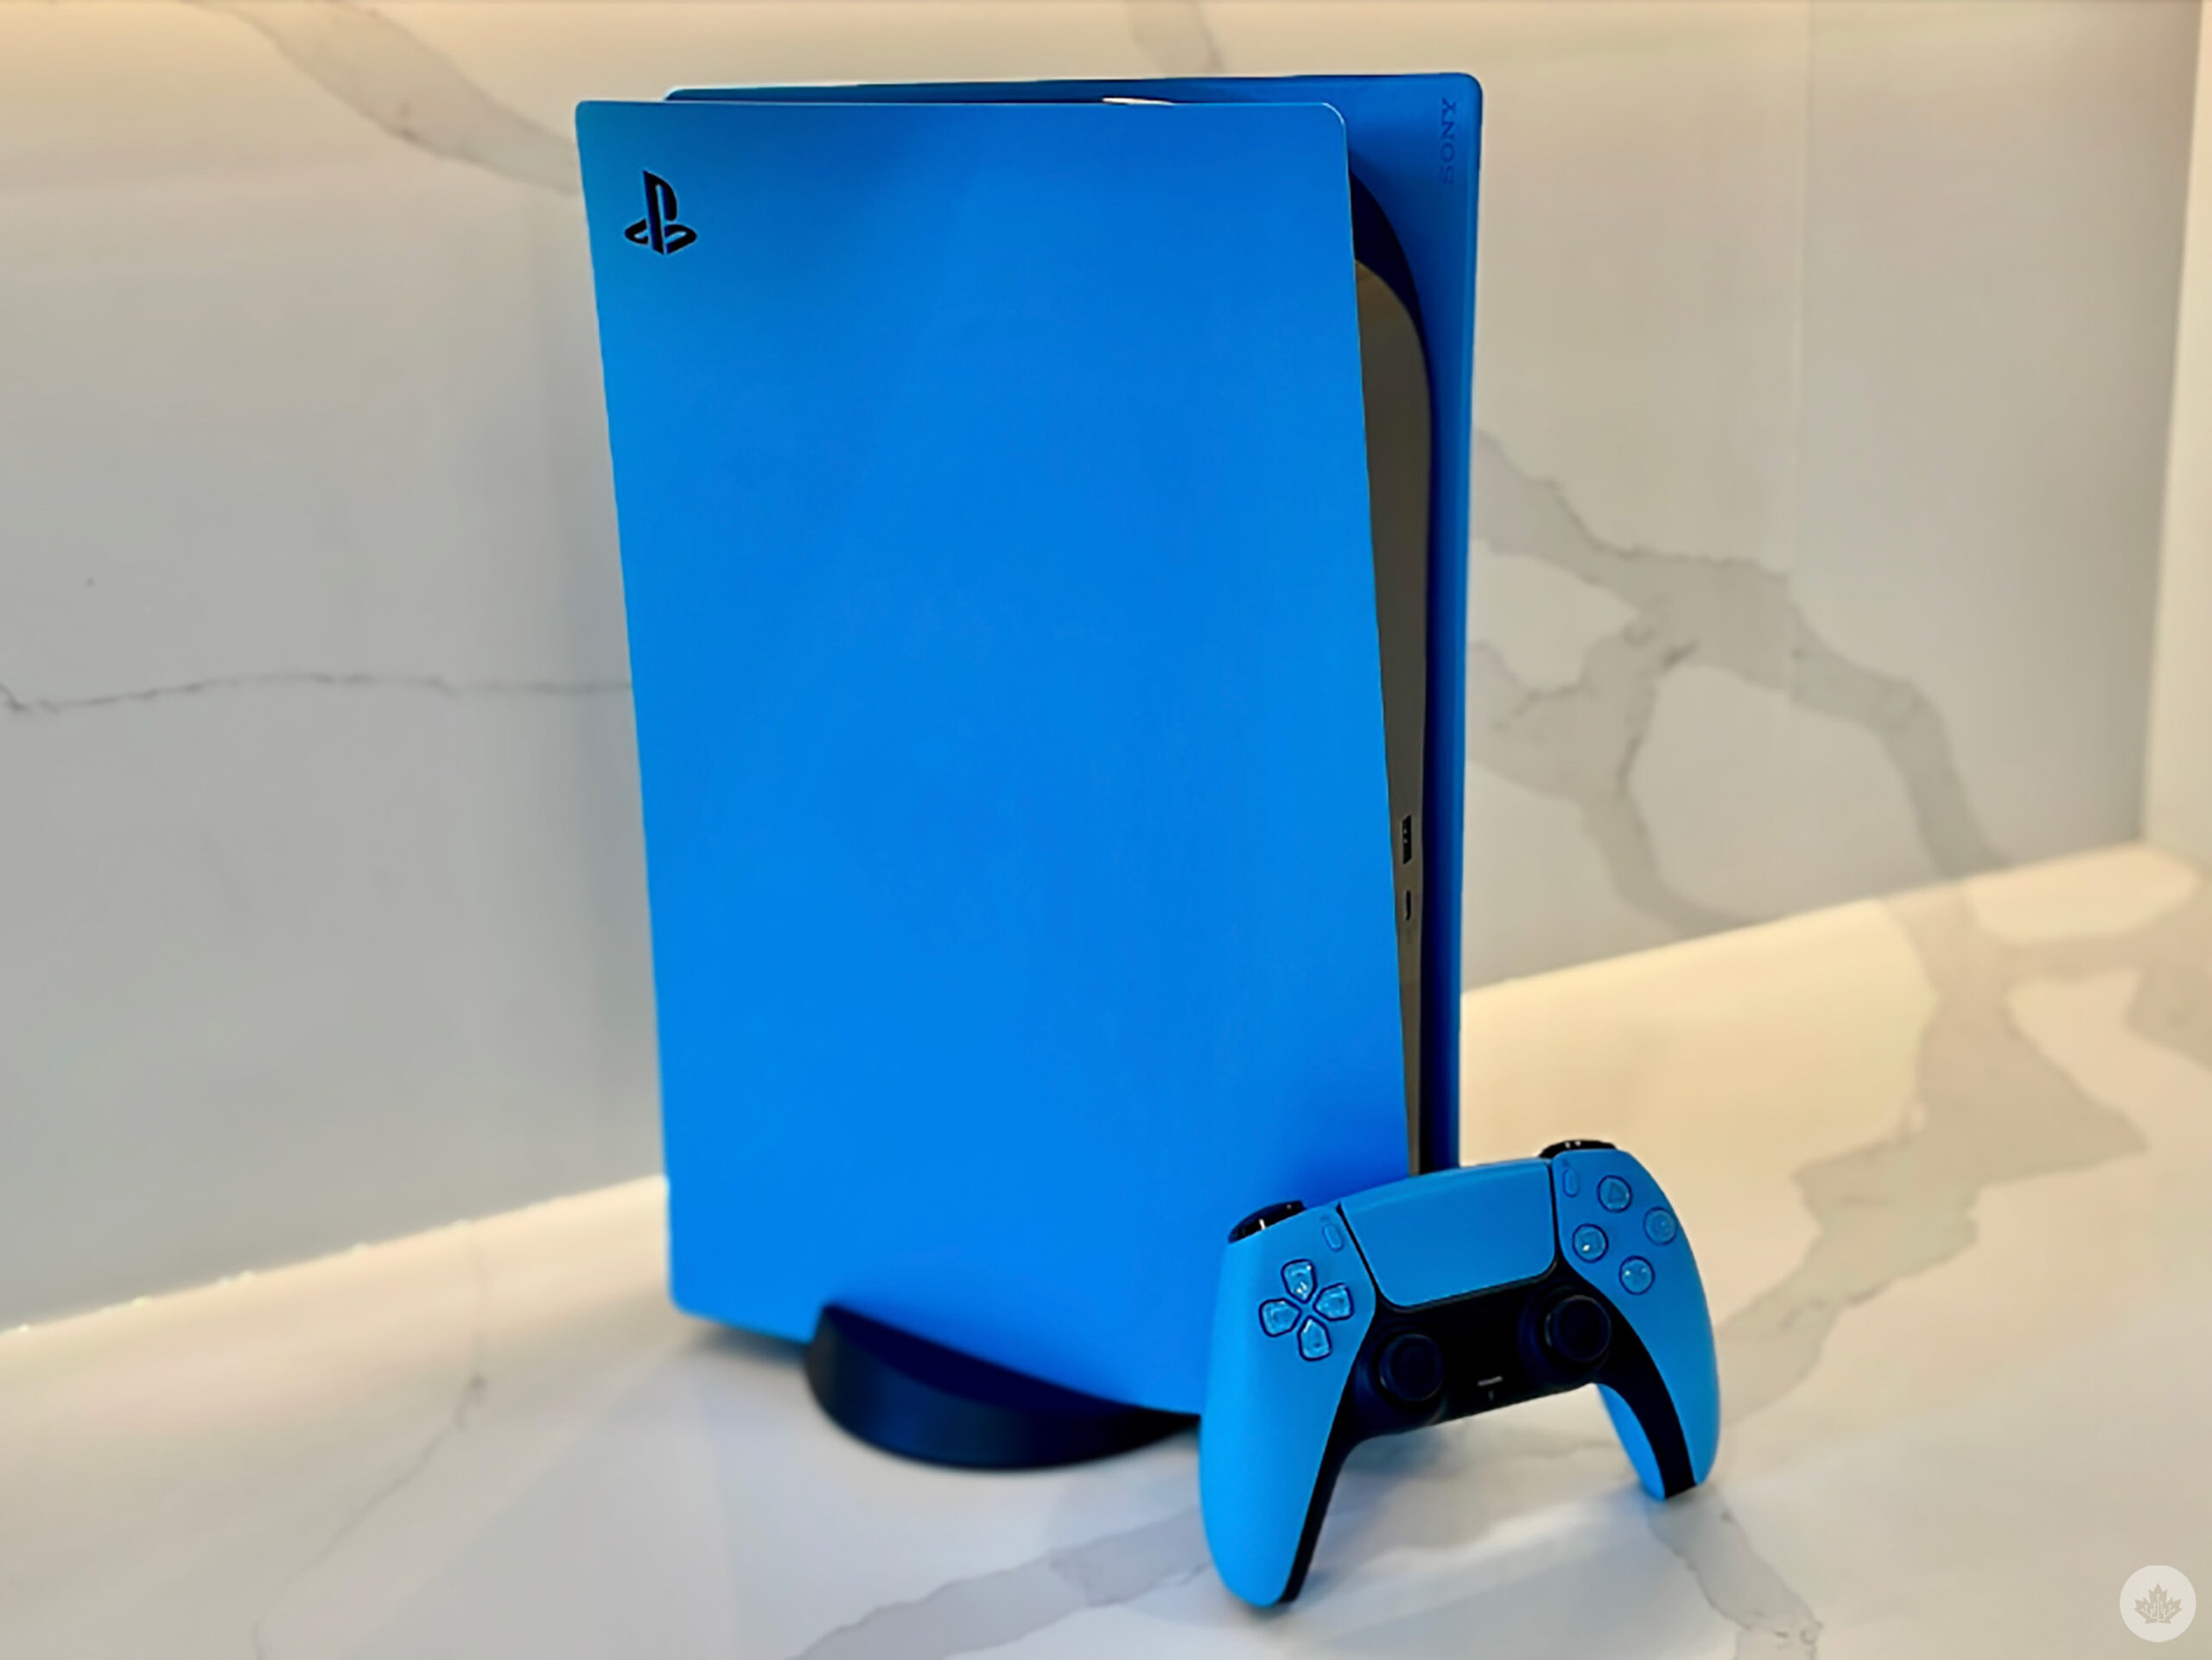
I took things one step forward and decided to swap out my stock white console shells for Starlight Blue. This is a totally optional, added-cost step but I decided to add a splash of colour to my gaming set-up.
Step 11 – Reconnect all the cables and format the SSD
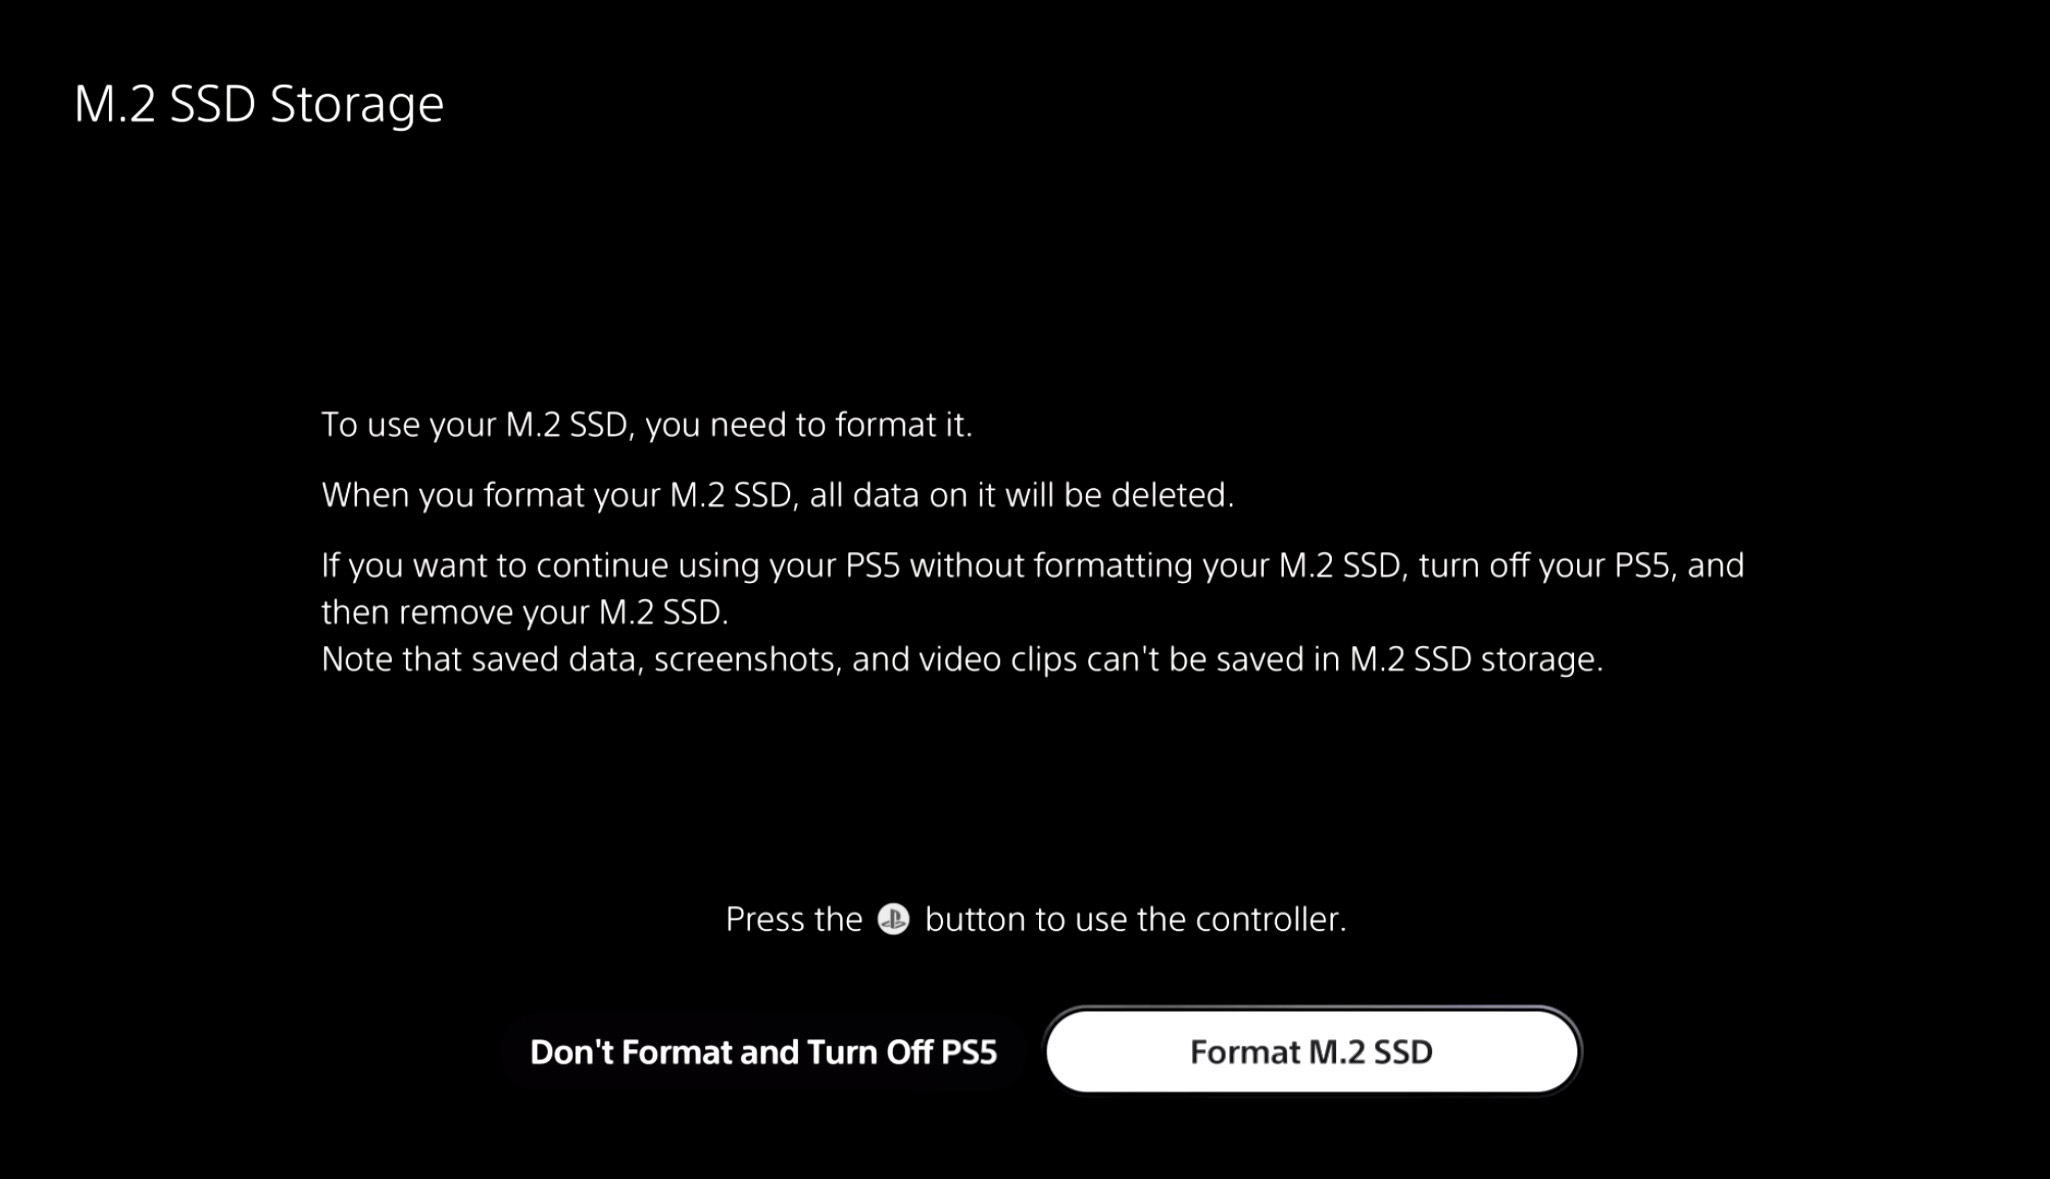
Once the cover is firmly attached, you can now connect all cables and turn on the console.
Your new SSD should be recognized and if it is, you’ll see the M.2 SSD Storage format screen. You’ll be prompted to format the drive, select “Format M.2 SSD” and after a few minutes you’ll be ready to use the new storage device.
 Congratulations! You have successfully installed a new SSD into your PS5. Now you can enjoy more space for games and other content.
You can purchase the 2TB version of the WD_BLACK SN850 at Amazon for $274.99.
MobileSyrup utilizes affiliate partnerships. These partnerships do not influence our editorial content, though we may earn a commission on purchases made via these links that helps fund the journalism provided free on our website.
MobileSyrup may earn a commission from purchases made via our links, which helps fund the journalism we provide free on our website. These links do not influence our editorial content. Support us here.
